1. Document history
| Date | Author | Changes |
|---|---|---|
2023-03-31 |
dh |
Add configuration of NixOS 22.11 in a virtual machine |
2023-03-05 |
dh |
Add remote IP logging in the Apache web server to log original IPv4 addresses in the IPv6-only web servers |
2022-12-31 |
dh |
Cover Ubuntu 22.04, add KVM host installation script with automation of all base steps, remove references to Ubuntu 16.04, proofread of the whole book |
2022-02-19 |
dh |
Add section on a Java setting which may cause problems, some other minor changes |
2021-05-19 |
dh |
Add DNS64 access control description on the physical host, some minor changes |
2021-03-21 |
dh |
Add firewall chapter with Shorewall and sshguard and cover systemd-networkd delay problem of virtual machines |
2020-08-09 |
dh |
Some updates on integration with web site and github, license added, preface rewritten |
2020-08-09 |
dh |
Initial version |
2. Preface
This is a book about setting up a Linux server and a number of services on it. It describes a so-called "virtualized setup". That is, the physical machine on which everything runs is separated into a number of "virtual machines" which run completely independent instances of operating systems. The virtual machines are held together by the operating system on the physical host - sometimes referenced as "hypervisor".
This setup is not totally unusual. In fact, these days it’s the normal way of working with many-core-multi-gigabyte systems available for purchase or rent.
There is, however, still a remarkable shortage of descriptions how to setup such a system based on IPv6 as primary protocol. Even though the classic IPv4 address pool is drought for several years now, setups continue to describe how to work with one public IPv4 address for the host system and a network of private IPv4 addresses for the virtual machines.
The setup described here works genuinely with IPv6 as communication protocol. The most important advantage is that all virtual machines can be accessed by official IP addresses directly without any further ado. Of course, this only works if the client also has IPv6 connectivity which is finally the case for more and more systems these days.
We also show how IPv6 and IPv4 get interconnected in this setup: How can an IPv6-only virtual machine access an IPv4-only server? How can IPv4-only clients access services on the IPv6-only virtual machines? Are there services which definitely need an IPv4 address on a virtual host (spoiler: yes) and how do we attach them?
Setting up the physical host is a rather complex process.
This book is accompaigned by the bash script install-kvm-host.sh which performs all the basic steps on a Hetzner Online root server with Ubuntu 22.04.
If you execute it, you can start installing virtual machines immediately afterwards.
2.1. License
This guide is published under the Creative Commons Attribution-ShareAlike 4.0 International license.
You are free to:
-
Share — copy and redistribute the material in any medium or format
-
Adapt — remix, transform, and build upon the material
for any purpose, even commercially.
Under the following terms:
-
Attribution — You must give appropriate credit, provide a link to the license, and indicate if changes were made. You may do so in any reasonable manner, but not in any way that suggests the licensor endorses you or your use.
-
ShareAlike — If you remix, transform, or build upon the material, you must distribute your contributions under the same license as the original.
Read more on https://creativecommons.org/licenses/by-sa/4.0/
install-kvm-host.sh is free software:
you can redistribute it and/or modify it under the terms of the GNU General Public License as published by
the Free Software Foundation, either version 3 of the License, or
(at your option) any later version.
2.2. Distribution
This guide is an Asciidoc document. It is hosted on Github and can be read online (or downloaded) as HTML or PDF document:
- HTML version
- PDF version
- Asciidoc sources
install-kvm-host.sh is distributed together with the Asciidoc sources in the github repository.
2.3. About the author
Born in 1972, Dirk Hillbrecht started working with computers in 1986, when his school offered a programming course using Turbo Pascal 3.0 on Apple II computers. In the 1990s he studied "Mathematics with focus on Computer Science" in Hannover. He administrated networks of Sun and Silicon Graphics machines at the university and witnessed the raise of Linux almost from its beginnings. Since 2000, he writes application software for fleet management and carsharing in Java. He still lives in Hannover, Germany.
2.4. About this guide
After having administrated Unix and Linux systems since the 1990s, I’ve rented my first real root server for myself only in 2016. While that machine worked and served things quite reliably, I felt it aging pretty fast. It was an Ubuntu 16.04 system, it had only 4 GB of RAM and a quite outdated Athlon64 processor.
Due to these parameters it was not possible to run virtualized setups - which I wanted to do to seperate services. E.g. that machine had a complete e-mail server setup which I intended to use for my private e-mail but still hesitated to activate as it was rather complex and "manually setup". I followed an instruction guide on the internet which even its author said is outdated only two years later.
There were other shortcomings like a less-than-optimal Let’s-encrypt setup. Let’s encrypt started almost at the same time as my server installation and there have been quite some optimisations since then.
All in all, my setup was aging, it was not sufficient for much more stuff on it and in the meantime, you got far more capable hardware for not so much more money.
So, in 2018 I decided to start "from scratch" with the system design. The first and most important design decision was about IP connectivity. IPv4 had run out of address space since more than five years then. IPv6 has been available for a decade or so. I wanted to do it in a modern way:
-
I assume to have only one IPv4 address but a sufficiently large IPv6 network routed to the rented server.
-
I build the system in a way that all "real" services run in virtual machines managed by Linux' KVM system.
-
The physical host gets the IPv4 address.
-
All virtual machines get only IPv6 addresses. No offical IPv4, not even a dual stack with private IPv4 and network-address translation (NAT). Only IPv6.
-
Virtual machines can access IPv4-only services in the internet through a NAT64/DNS64 gateway on the host.
-
Services on the virtual machines are only generally available from IPv6 addresses.
-
To serve incoming IPv4 requests, application proxys on the physical host forward traffic to the actual service handlers on a virtual machine if needed.
-
If for any reason a service on a virtual machine absolutely needs its own direct IPv4 connectivity, it is added "on top" of the setup.
Implementing this scheme initially took me about a week. I wrote all steps down and published a series of blog articles in my personal blog. As systems evolve and interest remained, I continued to update the articles. Eventually, I came to the conclusion that this scheme of updating was not flexible enough. So, I decided to rewrite the articles (and some unpublished articles with further explanations) into an Asciidoc document and publish it on github. As usual, this project became a bit bigger as I expected and after integrating and updating all information I suddenly had a PDF document of 80 pages - which, as you see, has still grown since then.
When reworking this guide for Ubuntu 22.04 in December 2022, I decided to build an automated process for the basic steps of setting up the physical host. The result is install-kvm-host.sh which is now distributed together with this guide. This surely makes my life easier as I do not have to perform all the steps in this guide manually (and therefore prone to errors). But it should also help everyone who wants to setup a server this way.
Have fun reading this guide! I hope it helps you setting up your own, modern, IPv6-first setup.
|
About IP addresses
IP addresses in this guide are made up and sometimes scrambled like 1.2.X.Y or 1234:5:X:Y::abcd. X and Y actually have to be numbers, of course…
|
The physical host
The first thing to start a virtualized server setup is to prepare the physical host. Sometimes it’s also called "hypervisor" or "domain zero". It all means the same: It is the actual hardware ("bare metal") with an operating system on it which hosts all the virtual machines to come. I’ll stick with the term "physical host" in this document when I reference this installation.
The operating system of the physical host can be totally different from the operating systems on the virtual machines. It can be a specialized system like VMWare’s ESXi or an extremly shrunken Linux or BSD system. The setup described here, however, is based on a stock Ubuntu installation for the physical host. It is a very broadly used system with tons of descriptions for different configuration. Chances are good that you find solutions for specific problems of your installation "in the internet" rather easily.
The physical host has to cope with the specific network infrastructure it is installed in. Depending on this external setup, configuration can be quite different between installations.
3. Physical hosts with one /64 network
IPv6 standards define that every host with IPv6 connectivity must have at least one /64 network assigned. Such an environment is the German hosting provider Hetzner Online: They only route one /64 network to each host. That disallows any routed setup between the physical host and the virtual machines. We’ll use the only network we have to access the physical host and all virtual machines. The default gateway for the physical host will be the link-local address pointing to Hetzner’s infrastructure. The default gateway for the virtual machines will be the physical host.
|
Why Hetzner Online?
This document wants to be an independent guide for setting up IPv6-first setups. However, my main information and research source are the servers I administrate myself. They are located at the German hoster Hetzner Online, so my knowledge and experience comes mainly from their environment. Hopefully, in the future other environments are added to this guide to make it less centric about one special provider. |
3.1. Initial setup of the host system at Hetzner’s
If you rent the Hetzner server, order it with the "rescue system" booted.
That gives the most control over how the system is configured.
I suggest that you access the server in this early stage by its IP address only.
We’ll change the IPv6 address of the system later in the install process.
If you want to have a DNS entry, use something interim to throw away later, e.g. <plannedname>-install.example.org.
As suggested above, I obtained my server in Hetzner’s "rescue system" which allows the OS installation through the installimage script.
I wanted to work as much as possible with default components and configurations, so I decided for the Ubuntu 22.04 [1] install image offered by Hetzner.
|
Stay with default setups as much as possible
I strongly advise you to always stick with the offered setups from your hosting provider as much as possible.
It increases your chance for support and your chances are much higher to find documentation if you run into problems.
|
Logging into the new server gives you a welcoming login screen somehow like this:
dh@workstation:~$ ssh -l root 2a01:4f8:1:3::2
The authenticity of host '2a01:4f8:1:3::2 (2a01:4f8:1:3::2)' can't be established.
ECDSA key fingerprint is SHA256:dbSkzn0MlzoJXr8yeEuR0pNp9FEH4mNsfKgectkTedk.
Are you sure you want to continue connecting (yes/no)? yes
Warning: Permanently added '2a01:4f8:1:3::2' (ECDSA) to the list of known hosts.

-------------------------------------------------------------------

  Welcome to the Hetzner Rescue System.

  This Rescue System is based on Debian 8.0 (jessie) with a newer
  kernel. You can install software as in a normal system.

  To install a new operating system from one of our prebuilt
  images, run 'installimage' and follow the instructions.

  More information at http://wiki.hetzner.de

-------------------------------------------------------------------

Hardware data:

   CPU1: AMD Athlon(tm) 64 X2 Dual Core Processor 5600+ (Cores 2)
   Memory:  3704 MB
   Disk /dev/sda: 750 GB (=> 698 GiB)
   Disk /dev/sdb: 750 GB (=> 698 GiB)
   Total capacity 1397 GiB with 2 Disks

Network data:
   eth0  LINK: yes
         MAC:  00:24:21:21:ac:99
         IP:   241.61.86.241
         IPv6: 2a01:4f8:1:3::2/64-/77777777777
         RealTek RTL-8169 Gigabit Ethernet driver

root@rescue ~ #
You might want to write down MAC address and IP addresses of the system.
Note, however, that they are also included in the delivery e-mail sent by Hetzner Online when the server is ready. You also see the addresses in the Hetzner Online server configuration interface or can request them with the ip -a command in the rescue system.
|
SSH keys for Hetzner rescue images
If you put your ssh public key into your Hetzner account and select it in the order process for the machine, it will not only be put into the rescue system but also into the root account of the freshly installed machine.
If you work this way, you never have to enter any passwords during the installation process. You can also select it each time you request a rescue system.
|
The system has two harddisks. I use them as a software RAID 1 as offered by the install script. This allows for at least some desaster recovery in case of a disk failure. And for systems like this, I do not install any partitions at all (apart from the Hetzner-suggested swap and /boot partition). The KVM disks will go to qcow2 files which are just put into the host’s file system. Modern file systems fortunately do not have any problems with 200+ GB files and this way, all the virtual guest harddisks are also covered by RAID.
Hetzner's installimage asks in a dialog for the image to use. This guide is applicable for the Ubuntu images, preferrably the 22.04 version, but 20.04 works also. 18.04 would be ok, too, but this version will be outdated in April 2023 [2] - don't use it for new installations any more.
The image installation process is controlled by a configuration file. Its (striped-down) version for the system I work on reads like this:
##  HARD DISK DRIVE(S):
# Onboard: SAMSUNG HD753LJ
DRIVE1 /dev/sda
# Onboard: SAMSUNG HD753LJ
DRIVE2 /dev/sdb

##  SOFTWARE RAID:
## activate software RAID?  < 0 | 1 >
SWRAID 1
## Choose the level for the software RAID < 0 | 1 | 10 >
SWRAIDLEVEL 1

##  BOOTLOADER:
BOOTLOADER grub

##  HOSTNAME:
HOSTNAME whatever (change this one to your system name, not with domain name)

##  PARTITIONS / FILESYSTEMS: (keep the defaults)
PART swap swap 4G
PART /boot ext3 512M
PART / ext4 all

##  OPERATING SYSTEM IMAGE: (you have selected this earlier in installimage)
IMAGE /root/.oldroot/nfs/install/../images/Ubuntu-1804-bionic-64-minimal.tar.gz
|
Installing the server deletes all data previously on it!
Just to be sure: If you use installimage (or similar installation routines from other providers) on an existing system, all data will be deleted on that system.
If unsure, check twice that you are on the right system.
A mistake at this point may be impossible to correct afterwards!
|
                Hetzner Online GmbH - installimage

  Your server will be installed now, this will take some minutes
             You can abort at any time with CTRL+C ...

         :  Reading configuration                           done
         :  Loading image file variables                    done
         :  Loading ubuntu specific functions               done
   1/16  :  Deleting partitions                             done
   2/16  :  Test partition size                             done
   3/16  :  Creating partitions and /etc/fstab              done
   4/16  :  Creating software RAID level 1                  done
   5/16  :  Formatting partitions
         :    formatting /dev/md/0 with swap                done
         :    formatting /dev/md/1 with ext3                done
         :    formatting /dev/md/2 with ext4                done
   6/16  :  Mounting partitions                             done
   7/16  :  Sync time via ntp                               done
         :  Importing public key for image validation       done
   8/16  :  Validating image before starting extraction     done
   9/16  :  Extracting image (local)                        done
  10/16  :  Setting up network config                       done
  11/16  :  Executing additional commands
         :    Setting hostname                              done
         :    Generating new SSH keys                       done
         :    Generating mdadm config                       done
         :    Generating ramdisk                            done
         :    Generating ntp config                         done
  12/16  :  Setting up miscellaneous files                  done
  13/16  :  Configuring authentication
         :    Fetching SSH keys                             done
         :    Disabling root password                       done
         :    Disabling SSH root login without password     done
         :    Copying SSH keys                              done
  14/16  :  Installing bootloader grub                      done
  15/16  :  Running some ubuntu specific functions          done
  16/16  :  Clearing log files                              done

                  INSTALLATION COMPLETE
   You can now reboot and log in to your new system with
  the same password as you logged in to the rescue system.

root@rescue ~ # reboot
Installing the system this way brings a fresh and rather small Ubuntu system on the disk. Note that ssh will complain massively about the changed host key of the system, but that is ok. You’re now booting the installed system which has another host key than the rescue system you used before.
dh@workstation:~$ ssh -l root 2a01:4f8:1:3::2
@@@@@@@@@@@@@@@@@@@@@@@@@@@@@@@@@@@@@@@@@@@@@@@@@@@@@@@@@@@
@    WARNING: REMOTE HOST IDENTIFICATION HAS CHANGED!     @
@@@@@@@@@@@@@@@@@@@@@@@@@@@@@@@@@@@@@@@@@@@@@@@@@@@@@@@@@@@
IT IS POSSIBLE THAT SOMEONE IS DOING SOMETHING NASTY!
[...]
Offending ECDSA key in /home/dh/.ssh/known_hosts
  remove with:
  ssh-keygen -f "/home/dh/.ssh/known_hosts" -R "2a01:4f8:1:3::2"
ECDSA host key for 2a01:4f8:1:3::2 has changed and you have requested strict checking.
Host key verification failed.
dh@workstation:~$ ssh-keygen -f "/home/dh/.ssh/known_hosts" -R "2a01:4f8:1:3::2"
# Host 2a01:4f8:1:3::2 found
/home/dh/.ssh/known_hosts updated.
dh@workstation:~$ ssh -l root 2a01:4f8:1:3::2
The authenticity of host '2a01:4f8:1:3::2 (2a01:4f8:1:3::2)' can't be established.
ECDSA key fingerprint is SHA256:z2+iz/3RRC3j6GT8AtAHJYnZvP9kdzw8fW8Aw5GPl0q.
Are you sure you want to continue connecting (yes/no)? yes
Warning: Permanently added '2a01:4f8:1:3::2' (ECDSA) to the list of known hosts.
Welcome to Ubuntu 18.04.1 LTS (GNU/Linux 4.15.0-38-generic x86_64)
[...]
root@merlin ~ #
After having booted into it, I had some hours of remarkably degraded performance as the RAID 1 had to initialize the disk duplication completely. Be aware of this, your server will become faster once this is over.
Use cat /proc/mdstat to see what’s going on on your harddisks.
root@merlin ~ # cat /proc/mdstat
Personalities : [linear] [multipath] [raid0] [raid1] [raid6] [raid5] [raid4] [raid10]
md0 : active raid1 sdb1[1] sda1[0]
      4190208 blocks super 1.2 [2/2] [UU]

md2 : active raid1 sdb3[1] sda3[0]
      727722816 blocks super 1.2 [2/2] [UU]
      [>....................]  resync =  4.0% (29775168/727722816) finish=147.8min speed=78670K/sec
      bitmap: 6/6 pages [24KB], 65536KB chunk

md1 : active raid1 sdb2[1] sda2[0]
      523712 blocks super 1.2 [2/2] [UU]

unused devices: <none>
If you install an e-mail server (or have some external mail service you want to use for system e-mails), you should enable alarming messages if the RAID degrades due to diskfailure. A RAID only protects against hardware failures if actually failed hardware is replaced quick enough.
|
Test the rescue system
This is a good moment to test whether Hetzner’s rescue mechanism works. Sometimes, the servers are not correctly configured in the BIOS and do not load the rescue system even if this is requested in the interface:
If something is wrong here, contact support and let them solve the problem. If you make mistakes in the host’s network configuration, you will need the rescue mode to sort things out. |
3.2. Continue using the install-kvm-host.sh script
This guide features the script install-kvm-host.sh which performs all steps following in this section on a Hetzner root server with a freshly installed Ubuntu 22.04. You may now fast forward to the description of install-kvm-host.sh to learn how to use it.
If any problems arise, you can go back to the following chapters to sort things out as the script really only performs the actions described here in the next sections.
If you want to do things on your own, if you work with another installation than Ubuntu 22.04 or if you are not on a Hetzner root server, read on to perform the setup steps manually.
3.3. Check preconditions on the server
You should check that the system supports virtualisation at all. Issue
egrep -c '(vmx|svm)' /proc/cpuinfo
and verify that the result is greater then 0. Then, apply
apt install cpu-checker
kvm-ok
and check that the result is
INFO: /dev/kvm exists
KVM acceleration can be used
If not, the BIOS settings of the system must be corrected. Contact the hosting provider to sort that out.
3.4. Put /tmp into a ramdisk
One thing which is totally independent from IPv6 and KVM is the /tmp directory.
It contains temporary files.
I like to put it into a ramdisk.
Add one line to /etc/fstab and replace /tmp with the following commands:
echo "none /tmp tmpfs size=2g 0 0" >> /etc/fstab && \
mv /tmp /oldtmp && mkdir /tmp && mount /tmp && rm -rf /oldtmp
This setup allows /tmp to grow up to 2 GB which is ok if the system has more than, say, 30 GB of memory.
You can, of course, allow more or less. Note that the memory is only occupied if /tmp really stores that much data.
An empty /tmp does not block any memory!
The mkdir creates /tmp without any special access rights.
Fortunately, declaring the file system to be tmpfs in /etc/fstab above makes the access rights 1777 (or rwxrwxrwt) - which is exactly what we need for /tmp.
You should reboot the system after this change.
Chances are that wiping /tmp this way confuses processes.
|
On the reboots
You will read "reboot the system" often during this guide.
This is not a joke!
We configure very basic system and network settings here and it is crucial that these settings are correct if the system starts up!
Check this step by step by rebooting and fix any problems before continuing.
Otherwise, your server will be unreliable - and that's a bad thing!
|
3.5. Adjust the time zone
One tiny piece in the puzzle is the timezone of the just-installed machine. At least the Hetzner Online installation scheme leaves the server with UTC as timezone. If you want to have it in the local timezone, change it via
timedatectl set-timezone <timezonename>
You get the available timezones with timedatectl list-timezone. For Germany, the command is timedatectl set-timezone "Europe/Berlin".
3.6. Preparing the network settings of the host
We do now have a freshly installed system. Unfortunately, it is not quite ready to serve as a KVM host. For this, we first have to configure a network bridge on the system.
I must say that I felt rather uncomfortable with Hetzner’s IPv6 approach in the beginning. Having only one /64 IPv6 network disallows a routed setup. Due to the way how IPv6 SLAAC address recovery works, you cannot split this network sensibly into smaller ones. I really suggest reading Why Allocating a /64 is Not Wasteful and Necessary and especially The Logic of Bad IPv6 Address Management to find out how the semantic of the IPv6 address space differs from IPv4. If you have a hoster who gives you a ::/56 or even ::/48 network, you can surely manage your addresses differently. Most probably, you will go with a routed setup.
However, since my start on the IPv6 road, I learned that Hetzner’s approach is not that wrong.
They use the link local fe80:: address range for gateway definitions and this a totally valid approach.
We have to use what we get. First, enable IPv6 forwarding globally by issuing
sysctl -w net.ipv6.conf.all.forwarding=1
Also enable this setting in /etc/sysctl.conf to make it permanent.
Now use ip a to get device name and MAC address of the physical network card of the system:
root@merlin ~ # ip a
1: lo: <LOOPBACK,UP,LOWER_UP> mtu 65536 qdisc noqueue state UNKNOWN group default qlen 1000
    link/loopback 00:00:00:00:00:00 brd 00:00:00:00:00:00
    inet 127.0.0.1/8 scope host lo
       valid_lft forever preferred_lft forever
    inet6 ::1/128 scope host
       valid_lft forever preferred_lft forever
2: enp2s0: <BROADCAST,MULTICAST,UP,LOWER_UP> mtu 1500 qdisc fq_codel state UP group default qlen 1000
    link/ether 00:24:21:21:ac:99 brd ff:ff:ff:ff:ff:ff
    inet 241.61.86.241/32 scope global enp2s0
       valid_lft forever preferred_lft forever
    inet6 2a01:4f8:1:3::2/64 scope global
       valid_lft forever preferred_lft forever
    inet6 fe80::224:21ff:fe21:ac99/64 scope link
       valid_lft forever preferred_lft forever
Your network device’s name may differ.
It can be something like enpXsY as in this example or enoX.
On all modern Linux distributions, it will begin with en, however…
Here the common track for all systems ends. In the Linux world, multiple network configuration setups have evolved over time. The most common ones are:
-
Direct setup in configuration files in
/etc/network. This is old-school networking setup, especially when combined with a System-V-initialisation process. I do not cover this here but you find a plethora of installation guides in the internet for this. -
Systemd-based configuration with files in
/etc/systemd/network. This is how many modern distributions handle system start and network setup these days. Ubuntu did it until 17.04, Hetzner’s Ubuntu did it longer. I cover this two sections further. -
Netplan with a configuration in
/etc/netplan. This kind of "meta-configuration" is used by Ubuntu since 17.10 and by Hetzner since November 2018 for 18.04 and 18.10. I describe the needed changes in the following section.
3.6.1. Ubuntu 18.04 and later with Netplan
Ubuntu 18.04 and the later versions comes with Netplan to configure the network. Since about November 2018, Hetzner uses this setup in their install process. Note that earlier Ubuntu installations are provided with systemd-networkd-based setup described below.
Netplan uses configuration files with YAML syntax.
In most cases, there is only one file: /etc/netplan/01-netcfg.yaml.
For freshly installed Hetzner servers with Ubuntu 22.04, it looks somehow like this:
root@merlin /etc/netplan # cat 01-netcfg.yaml
### Hetzner Online GmbH installimage
network:
  version: 2
  renderer: networkd
  ethernets:
    enp2s0:
      addresses:
        - 241.61.86.241/32
        - 2a01:4f8:1:3::2/64
      routes:
        - on-link: true
          to: 0.0.0.0/0
          via: 241.61.86.225
        - to: default
          via: fe80::1
      nameservers:
        addresses:
          - 185.12.64.2
          - 2a01:4ff:ff00::add:1
          - 185.12.64.1
          - 2a01:4ff:ff00::add:2
What you do now is:
-
Define a bridge device
br0; -
Assign all settings of the physical ethernet device to that bridge;
-
Bind the bridge to that device;
-
Pinpoint its MAC address to the one of the physical device, otherwise traffic will not be routed;
-
Disable all network configuration on the physical device.
After these changes, the Netplan configuration from above looks like this:
root@merlin ~ # cat /etc/netplan/01-netcfg.yaml
### Hetzner Online GmbH installimage
network:
  version: 2
  renderer: networkd
  ethernets:
    enp2s0:
      dhcp4: false
      dhcp6: false
  bridges:
    br0:
      accept-ra: false
      macaddress: 00:24:21:21:ac:99
      interfaces:
        - enp2s0
      addresses:
        - 241.61.86.241/32
        - 2a01:4f8:1:3::2/64
      routes:
        - on-link: true
          to: 0.0.0.0/0
          via: 241.61.86.225
        - to: default
          via: fe80::1
      nameservers:
        addresses:
          - 185.12.64.2
          - 2a01:4ff:ff00::add:1
          - 185.12.64.1
          - 2a01:4ff:ff00::add:2
Note that you also disable any IPv6 auto-configuration on the br0 device by adding accept-ra: false into its configuration.
We'll setup the routing advertisement daemon lateron for the virtual machines, but it should not interact with the physical host.
Netplan has the very nice capability to apply a new configuration to a running system and roll it back if something goes wrong.
Just type netplan try.
If the countdown counts down (some stalled seconds at the beginning are allowed), just hit Enter and make the change permanent.
Otherwise, wait for two minutes and Netplan will restore the old configuration so that you should be able to login again and fix the problem without further ado.
I suggest to finish this on success with a complete reboot to be really sure that the new configuration is applied on system startup.
After a reboot, the network device list should look like this:
root@merlin ~ # ip a
1: lo: <LOOPBACK,UP,LOWER_UP> mtu 65536 qdisc noqueue state UNKNOWN group default qlen 1000
    link/loopback 00:00:00:00:00:00 brd 00:00:00:00:00:00
    inet 127.0.0.1/8 scope host lo
       valid_lft forever preferred_lft forever
    inet6 ::1/128 scope host
       valid_lft forever preferred_lft forever
2: enp2s0: <BROADCAST,MULTICAST,UP,LOWER_UP> mtu 1500 qdisc fq_codel master br0 state UP group default qlen 1000
    link/ether 00:24:21:21:ac:99 brd ff:ff:ff:ff:ff:ff
3: br0: <BROADCAST,MULTICAST,UP,LOWER_UP> mtu 1500 qdisc noqueue state UP group default qlen 1000
    link/ether 00:24:21:21:ac:99 brd ff:ff:ff:ff:ff:ff
    inet 241.61.86.241/32 scope global br0
       valid_lft forever preferred_lft forever
    inet6 2a01:4f8:1:3::2/64 scope global
       valid_lft forever preferred_lft forever
    inet6 fe80::224:21ff:fe21:ac99/64 scope link
       valid_lft forever preferred_lft forever
Note that the physical device enp2s0 and the bridge br0 have the same MAC address.
This is intentional!
You should test now that you can login to the system through both IPv6 and IPv4 protocol, use ssh -6 <hostname> and ssh -4 <hostname> to enforce the IP protocol version.
3.6.2. Ubuntu 20.04 with gateway6 directive
Note that Ubuntu 20.04 (and earlier) did not define the IPv6 default route with a standard routes definition, but used a specific gateway6 key:
network:
[...]
  ethernets:
  [...]
      routes:
        - on-link: true
          to: 0.0.0.0/0
          via: 241.61.86.225
      gateway6: fe80::1
Move this definition as it is into the br0 section:
network:
[...]
  bridges:
    br0:
    [...]
      routes:
        - on-link: true
          to: 0.0.0.0/0
          via: 241.61.86.225
      gateway6: fe80::1
3.6.3. Ubuntu 18.04 and other systems with systemd-networkd
|
This section is not updated any more
This section is not updated any more. Actually, Ubuntu gave up on direct systemd configuration.
|
Until October 2018, Hetzner used a systemd-networkd-based setup on Ubuntu, even with 18.04. If you have such a system, you get the same result in a different way. Creating a bridge for virtual machines using systemd-networkd explains the basics nicely.
With this system, go to /etc/systemd/network and define a bridge device in file 19-br0.netdev:
[NetDev]
Name=br0
Kind=bridge
MACAddress=<MAC address of the physical network card of the host>

[Bridge]
STP=true
It is extremly important to define the MAC address, or Hetzner will not route traffic to the system. STP seems not mandatory, does not hurt either. I kept it in.
Then, assign the bridge to the physical device in 20-br0-bind.network:
[Match]
Name=eno1

[Network]
Bridge=br0
Now copy the original file created by Hetzner (here: 10-eno1.network) to 21-br0-conf.network and replace the matching name from the physical device to the bridge.
In fact, you only replace the eno1 (or whatever you network device’s name is) with br0.
You also add IPv6AcceptRA=no to prevent the physical host’s network being influenced from the SLAAC messages of radvd which is installed later:
[Match]
Name=br0

[Network]
Address=<IPv6 address assigned by Hetzner, do not change>
Gateway=fe80::1  // This is always the IPv6 gateway in Hetzner's network setup
Gateway=<IPv4 gateway assigned by Hetzner, do not change>
IPv6AcceptRA=no

[Address]
Address=<IPv4 address of the system assigned by Hetzner, do not change>
Peer=<IPv4 peer assigned by Hetzner, do not change>
Rename the original file 10-eno1.network to something not detected by systemd, e.g. 10-eno1.networkNO.
Keep it around in case something goes wrong.
After these changes, the physical device has not any networks attached. This is important so that the bridge can grab it on initialization. Let’s see whether everything works and reboot the system.
If something goes wrong: Boot into rescue system, mount partition, rename 10-eno1.networkNO back into original name ending in .network.
Reboot again.
Investigate. Repeat until it works…
3.7. Ensure correct source MAC address
Our virtual machines will have their own MAC addresses. Otherwise, the IPv6 auto configuration would not work. Unfortunately, these MAC addresses will also leak through the bridge into Hetzner's network and that might lead to trouble as the provider does only accept the actual assigned MAC address of the main server as valid.
To prevent such problems perform MAC address rewriting using the ebtables command.
You might need to install it using apt install ebtables first.
Then use:
ebtables -t nat -A POSTROUTING -j snat --to-src <MAC address of the physical network card of the host>
I've added this to /etc/rc.local.
On a default installation of Ubuntu 22.04 (or 20.04 - or 18.04), this file does not exist.
If you create it, make it look like this:
#!/bin/bash

# force source MAC address of all packets to the official address of the physical server
ebtables -t nat -A POSTROUTING -j snat --to-src 00:24:21:21:ac:99

exit 0
Replace the address in the example with your actual physical MAC address!
Also, make the file executable with chmod +x /etc/rc.local.
"The internet" claims that you need to add other files to systemd for /etc/rc.local being evaluated in Ubuntu.
At least for me this was not needed, it "just worked".
Check whether the rule has been added:
root@merlin ~ # ebtables -t nat -L
Bridge table: nat

Bridge chain: PREROUTING, entries: 0, policy: ACCEPT

Bridge chain: OUTPUT, entries: 0, policy: ACCEPT

Bridge chain: POSTROUTING, entries: 1, policy: ACCEPT
-j snat --to-src 00:24:21:21:ac:99 --snat-target ACCEPT
root@merlin ~ #
Reboot the systems once more to check if the rule survives a reboot.
3.8. Change IPv6 address
This step is not performed by install-kvm-host.sh.
|
You might think about changing the IPv6 address of the physical host.
Hetzner Online configures them always having 0:0:0:2 as IPv6 address host part.
While there is nothing wrong with that, giving the host a random address makes the whole installation a bit less vulnerable to brute-force attacks.
Fortunately, changing the address is really simple.
In the Netplan-based setup, it is in /etc/netplan/01-netcfg.yaml. Look for the addresses of the br0 device:
network:
[...]
  bridges:
    br0:
[...]
      addresses:
        - 2a01:4f8:1:3::2/64
Change it’s host part (the lower 64 bits) to more or less whatever you like
- 2a01:4f8:1:3:6745:a24b:cc39:9d1/64
If you work with systemd-networkd, the network configuration is in /etc/systemd/network/21-br0-conf.network if you followed this guide:
[Network]
Address=2a01:4f8:1:3::2/64
Change it to
[Network]
Address=2a01:4f8:1:3:6745:a24b:cc39:9d1/64
You can also add and not replace the additional address. Then, your server can be accessed through both addresses. While it is absolutely no problem to have multiple IPv6 addresses on the same device, it can make configuration of services more difficult as the correct address for outgoing messages has to be selected correctly. I would suggest not to do this. Stay with one IPv6 address.
Use netplan try or systemctl restart systemd-networkd to apply the new settings.
Note that if you are connected via IPv6, your connection will be interrupted and you have to reconnect.
If you are connected via IPv4 (e.g. by ssh <IPv4-address> or ssh -4 <hostname>), your connection should survive.
systemd-networkd, however, might need several seconds to sort everything out.
If everything works, add a reboot. In theory, restarting the network configuration should be sufficient, but at least back in the days of Ubuntu 18.04 and earlier my system sometimes behaved strangely after this change.
ssh to the new address should now work. If it doesn’t and your are locked out, again use the rescue system to sort it out.
3.9. Add DNS entries
Now is the time to add the physical host to the DNS:
-
Add an
AAAArecord in the domain the system should be reachable in. -
Add a
PTRrecord in the hoster’s reversal IP entries. If there is already an entry for the former address, you can remove it by simply wiping out the server name and pressing "Enter". -
While you’re at it, also add the
Arecord and thePTRrecord for the IPv4 address of the Host.
|
Keep DNS time-to-live short!
I strongly suggest that you set the TTL for all DNS entries as short as possible during the setup, something between 2 and 5 minutes.
If you make a mistake and you have a TTL of multiple hours or even a day, you may have serious issues with the name service as long as the TTL of the wrong entries is not invalid everywhere.
|
|
The rescue system IP address
If you ever have to reboot your server into Hetzner’s rescue system, keep in mind that it will get its original IPv6 address ending in ::2.
You will not be able to access it through its DNS name.
You might want to add a DNS entry for <servername>-rescue.example.org for such cases.
Of course, you have to remember that, too…
|
At this stage, lean back for a moment! The difficult part is done. You have the network setup of your KVM host up and running. The rest is much easier and will not potentially kill network access to system. Also, the stuff coming now is much less provider-specific. While the initial network setup might work considerably different with another hosting provider, chances are good that the following steps are the same regardless of where you have placed your host.
4. Setup the KVM environment
The physical host is now up and running. To actually host virtual machines with IPv6-first connectivity, some more services need to be installed.
4.1. NAT64 with Tayga
As I wrote, our virtual machines shall have IPv6-only internet access. That implies that they cannot access systems which are IPv4-only. Unfortunately, even in 2022 there are quite popular sites like github.com which do not have any IPv6 connectivity at all. To make such systems accessible from the guest systems, we setup a NAT64 service which performs a network address translation for exactly this case.
I decided to go with the "Tayga" server. It’s scope is limited to exactly perform NAT64. This makes it necessary to add further services to make all this really useable but it also minimizes configuration complexity.
4.1.1. How Tayga works (in this setup)
Tayga acts as a network address translator.
It receives incoming IPv6 packets targetted at an address in the 64:ff9b::/96 network.
It takes the least 32 bits of this address and takes them as IPv4 target address.
I.e. the IPv4 address 1.2.3.4 will be represented by the IPv6 address 64:ff9b::102:304.
|
Representation of IPv4 address parts in IPv6 addresses
IPv4 uses decimal numbers to represent address parts, IPv6 uses hexadecimal representation.
An IPv4 address like It is allowed to write the lowest 32 bits of an IPv6 address in the usual IPv6 address syntax,
so the address can also be written as I refrain from this syntax in this guide. |
Additionally, Tayga takes the IPv6 source address and maps it onto a private IPv4 address, e.g. one out of 192.168.255.0/24.
With these two IPv4 addresses it constructs an IPv4 packet with the content of the received IPv6 packet and puts it into the IPv4 network stack of the physical host.
Now, Linux takes over. It uses its standard source NAT mechanisms to map the IPv4 packet with the private source address onto the public IPv4 address of the machine and sends it out. When the answer package arrives, it converts the target address back onto the private IPv4 address the packet emerged from and forwards it to the Tayga process.
Tayga can rebuild the IPv6 origin of the communication from the private IPv4 target address of the answer packet.
It also can derive the correct 64:ff9b::/96 source address from the IPv4 source address of the packet.
With these two addresses it builds an IPv6 packet with the same content as the received IPv4 packet and sends it to the actual IPv6 communication partner.
The whole scheme looks like this:

4.1.2. Installing Tayga on the physical host
Start by installing the tayga service by the usual apt install tayga.
In /etc/tayga.conf, enable the disabled ipv6-addr directive as this is needed for working with the well-known prefix. Set the IPv6 address to something random in your IPv6 subnet:
ipv6-addr 2a01:4f8:1:3:135d:6:4b27:5f
Additionally, switch the prefix directive from the activated 2001… one to the 64:ff9b::/96 one:
# prefix 2001:db8:1:ffff::/96
prefix 64:ff9b::/96
The whole Tayga configuration reads like this afterwards:
# Minimum working NAT64 Tayga configuration for KVM host with IPv6-only guests

# (A) Basic setup
# Device name, this is the default
tun-device nat64
# Data dir for stateful NAT information
data-dir /var/spool/tayga

# (B) IPv6 setup
# The "well-known" prefix for NAT64
prefix 64:ff9b::/96
# IPv6 address, from the official ::/64 network
ipv6-addr 2a01:4f8:X:Y:14a5:69be:7e23:89

# (C) IPv4 setup
# Pool of dynamic addresses
dynamic-pool 192.168.255.0/24
# IPv4 address, not to be used otherwise in the network
ipv4-addr 192.168.255.1
Test the new setup by starting tayga once in foreground:
systemctl stop tayga  <-- Disable if already started
tayga -d --nodetach
This should give something like this:
starting TAYGA 0.9.2
Using tun device nat64 with MTU 1500
TAYGA's IPv4 address: 192.168.255.1
TAYGA's IPv6 address: 2a01:4f8:1:3:135d:6:4b27:5f
NAT64 prefix: 64:ff9b::/96
Note: traffic between IPv6 hosts and private IPv4 addresses (i.e. to/from 64:ff9b::10.0.0.0/104, 64:ff9b::192.168.0.0/112, etc) will be dropped.  Use a translation prefix within your organization's IPv6 address space instead of 64:ff9b::/96 if you need your IPv6 hosts to communicate with private IPv4 addresses.
Dynamic pool: 192.168.255.0/24
Stop the manually started instance with Ctrl-C.
|
Enable the service explicitly on Ubuntu 18.04 and earlier
On Ubuntu 18.04 (and earlier), you have to explicitly enable the service. Edit Change in /etc/default/tayga
# Change this to "yes" to enable tayga RUN="yes" |
Launch the service with systemctl start tayga. After that, systemctl status tayga should report the Active state active (running); the log lines in the status output should end with
... systemd[1]: Started LSB: userspace NAT64.
|
Forgot to enable the service on Ubuntu 18.04 and earlier?
If the Active state is active (exited) and the protocol says something about set RUN to yes, you have forgotten to enable the RUN option in /etc/default/tayga. Correct it as described above and issue systemctl stop tayga and systemctl start tayga.
|
4.1.3. Tayga and firewalls
As described above, Tayga uses the Linux network stack for the IPv4 source NAT step.
For this, it adds a routing rule into the kernel.
You can see it using e.g. iptables:
# iptables -t nat -L
[...]
Chain POSTROUTING (policy ACCEPT)
target     prot opt source               destination
[...]
MASQUERADE  all  --  192.168.255.0/24     anywhere
It is important that this rule exists, otherwise NAT64 will not work! Keep this in mind especially if you install a firewall on the physical host. If that firewall overwrites the complete routing rules set, it will also drop this rule and render Tayga unfunctional. We cover below how to integrate Tayga with the Shorewall firewall.
4.2. DNS64 with bind
In the last chapter, we have assumed that the IPv6-only system maps IPv4-only targets on a makeshift IPv6 address. The question remains how it is tricked into doing this. We solve this problem now.
4.2.1. The concept of DNS64
NAT64 is usually used together with a "DNS64" name server. This is a specially configured name server. If a client asks it for an IPv6 name resolution, i.e. an AAAA name service record, and there is only an IPv4 A record for the requested name, the DNS64 name server "mocks up" an AAAA record munging the IPv4 address and a "well-known prefix" to a synthetical IPv6 address. This address - surprise, surprise - points directly to a nicely prepared NAT64 server so that the IPv6 system talks to an IPv4 system transparently hidden behind the NAT64 proxy.

4.2.2. Installing bind with DNS64
We setup the DNS64 server using a classic bind DNS server. Modern versions include DNS64, it only has to be activated. Start the install with the usual apt install bind9.
Our bind is a forwarding-only server only for our own virtual machines. On Debian-derived systems, the bind options needed for this setup are located in /etc/bind/named.conf.options. Edit that file and enter the following entries:
options {
        directory "/var/cache/bind";

        forwarders {
                2a01:4f8:0:1::add:1010;  # Hetzner name servers
                2a01:4f8:0:1::add:9999;
                2a01:4f8:0:1::add:9898;
        };

        dnssec-validation auto;

        auth-nxdomain no;    # conform to RFC1035
        listen-on {};
        listen-on-v6 {
                <IPv6 network assigned by provider>::/64;
        };
        allow-query { localnets; };
        dns64 64:ff9b::/96 {
                clients { any; };
        };
};
The actual important definition is the dns64 section at the bottom of the options definitions. It enables the DNS64 mode of bind and defines the IPv6 address range into which the addresses should be converted.
It also important to define listen-on {}; to disable listening on the IPv4 port altogether - we do not need it. Restricting allow-query to the localnets is also important to prevent the server from becoming an open DNS relay. We only need it for our internal network.
The forwarders section defines the name servers this bind will ask if it does not know the answer itself - which is almost always the case. I put Hetzner’s server names here. Of course, you must either use the DNS of your hoster or provider or a free and open server like Google’s public DNS at 2001:4860:4860::8888 and 2001:4860:4860::8844.
|
Check the networks twice
Check the network in listen-on-v6 and also check the forwarders. You whole IP address resolution will not work if one of these is wrong.
|
Restart the daemon and check that it is enabled and running:
systemctl restart bind9
systemctl status bind9
After these steps, you have a working DNS64 server which you can use for all you virtual machines on the system. You can test that it really answers with DNS64-changed entries by querying something which does not have an IPv6 address:
root@physical:~# host github.com  # Query using external default DNS server
github.com has address 140.82.118.3
github.com mail is handled by [...]

root@physical:~# host github.com 2a01:4f8:1:2:3:4:5:6  # Give IPv6 address of local server
[...]
github.com has address 140.82.118.3
github.com has IPv6 address 64:ff9b::8c52:7603
github.com mail is handled by [...]
Note how the DNS server running on the physical host returns the additional IPv6 address with 64:ff9b prefix. To be sure that the local server is really addressed, give its IPv6 address as additional parameter to the host command as shown above.
|
Using an external DNS64 server
So far, the name server is only used for DNS64. You can also use the Google servers 2001:4860:4860::6464 and 2001:4860:4860::64 (yes, these are other servers than the public DNS servers mentioned above) offering this service. Their replies are compatible with our NAT64 setup. However, having an own server reduces external dependencies and allows for additional services lateron.
|
4.2.3. Restricting DNS64 to certain virtual machines
You can restrict DNS64 service to certain of the virtual machines on the host. This might be needed as a machine should explicitly not connect to IPv4 servers or because it has its own IPv4 address and should it to connect to the IPv4 internet instead of NAT64.
DNS64 access restriction is done via bind9’s access control lists. Just define an access control list for the DNS64 service and refer to it in the service configuration:
acl dns64clients {
   # address specification
};

options {
        [...]
        dns64 64:ff9b::/96 {
                clients { dns64clients; };  # Refer to the ACL defined above
        };
};
There are two ways to specify the servers to allow DNS64 access:
-
You can simply specify the IPv6 addresses of all virtual machines which are allowed to use DNS64:
DNS64 ACL with a positive host listacl dns64clients { 2a01:4f8:1:2:a:bc:345:9; 2a01:4f8:1:2:a:bc:678:e; 2a01:4f8:1:2:a:bc:432:7; [...] };You might work with net definitions (e.g.
2a01:4f8:1:2:a:bc::/96;), but normally it does not really make any sense. The IPv6 addresses of your virtual machines will be derived from the MAC addresses of their (virtual) network cards and those are assigned randomly when the virtual machine is created. So, just stick with the actual, full IP adresses here. -
You can also define the control list the other way around and specify those virtual hosts which should not use DNS64:
DNS64 ACL with a negative host listacl dns64clients { !2a01:4f8:1:2:a:bc:567:d; !2a01:4f8:1:2:a:bc:901:3; !2a01:4f8:1:2:a:bc:864:b; [...] any; # Grant access for all others! };This option is better if DNS64 is the norm in your setup and you only want to exclude a small number of specific servers.
Note that the final entry in your list must be
any;if you work with negative host specifications - otherwise, no DNS64 service is granted for anyone!
4.3. Router advertisement with radvd
With NAT64 and DNS64 in place, we’re almost ready to serve virtual machines on the host. The last missing bit is the network configuration.
Of course, you could configure your virtual hosts' network manually. However, IPv6 offers very nice auto-configuration mechanisms - and they are not difficult to install. The key component is the "router advertisement daemon". It’s more or less the IPv6-version of the notorious DHCP service used in IPv4 setups to centralize the IP address management.
For this service, we use the radvd router advertisement daemon on the bridge device so that our virtual machines get their network setup automatically by reading IPv6 router advertisements.
Install radvd and also radvdump for testing through the usual Debian/Ubuntu apt install radvd radvdump.
Then, create the configuration file /etc/radvd.conf. It should contain the following definitions:
interface br0 {
        AdvSendAdvert on;
        AdvManagedFlag off;
        AdvOtherConfigFlag off;
        AdvDefaultPreference high;
        prefix <IPv6 network assigned by provider>::/64 {
                AdvOnLink on;
                AdvAutonomous on;
                AdvRouterAddr on;
                AdvValidLifetime infinity;
        };
        RDNSS <IPv6 address of the physical host> {};
        route 64:ff9b::/96 {
                AdvRouteLifetime infinity;
        };
};
The route section advertises that this system routes the 64:ff9b:: network. Only with this definition the virtual servers know where to send the packets for the emulated IPv6 addresses for the IPv4-only servers to.
IPv6 route advertisement is prepared for dynamically changing routes. In our setup, however, all routes are static. Therefore, prefix and route advertisements are announced with "infinite" lifetime.
|
Use Googles DNS64 servers
If you opted for the Google DNS64 servers to do the job, write instead RDNSS 2001:4860:4860::6464 2001:4860:4860::64 {
AdvRouteLifetime infinity;
};
This announcement can also have inifinite lifetime. Even if Google changed their server addresses, the definition here stays static. |
A radvd configuration must always be read as advertisement of the machine serving it.
So, you do not write something like "service X is on machine Y" but "This machine offers X".
Having this in mind, the configuration advertises all three network settings needed by the virtual machines:
-
The
prefixsection defines that this host announces itself as router (AdvRouterAddr) to the given network and allows the machines to use SLAAC for generating their own IPv6 address (AdvAutonomous). -
The RDNSS section declares this machine to be the DNS resolver for the virtual machines.
-
The
routesection adds the static route for NAT64 IP addresses to this machine.
Start radvd and make it a permanent service (coming up automatically after reboot) using
systemctl start radvd
systemctl enable radvd
If you start radvdump soon after starting radvd, you will see the announcements sent by radvd in irregular intervals. It should contain the network router, the DNS server and the NAT64 route. Note that radvd turns to rather long intervals between the advertisements after some time if noone is listening.
|
Spurious auto-configured routes on br0
After inet6 2a01:4f8:1:2345:abc:4680:1:22/64 scope global dynamic mngtmpaddr noprefixroute
valid_lft 85234sec preferred_lft 14943sec
your bridge is responding to the network announcements. Go back to the network configuration above and add inet6 2a01:4f8:1:2345:abc:4680:1:22/64 scope global
valid_lft forever preferred_lft forever
|
If you ever change the configuration, restart radvd and check its output with radvdump. It should contain both the DNS server and the NAT64 route.
|
The nasty Hetzner pitfall
In their own documentation, Hetzner also describes how to setup radvd. For the DNS servers, however, they use IPv6 example addresses from the 2001:db8 realm. It took me three days and severe doubts on Hetzner’s IPv6 setup to find out, that my only mistake was to copy these wrong IP addresses for the DNS server into the configuration. Don’t make the same mistake…
|
You have now prepared everything for the IPv6-only virtual machines to come: They get their network configuration through the centrally administrated radvd. The advertised setup includes a name server with DNS64 an a NAT64 route to access IPv4-only systems.
|
About non-virtual network setups
So far, this document describes how to setup a root server with virtual machines. Especially NAT64/DNS64 is completely independent of that. If you administrate a (real) computer network and want to lay ground for IPv6-only machines in that, do exactly the same with your physical machines: Install Tayga and the DNS64-capable Bind9 on router behind which the IPv6-only systems reside. This might be the "firewall" of classical setups. Then, your actual computers play the role of the virtual machines in this guide.
|
5. Install KVM and finish the setup
We’re now ready for the final steps! Our network is configured far enough so that we really can start installing virtual machines on our system. For this, we of course need KVM.
5.1. Install libvirtd and its environment
For Ubuntu, I followed the first steps of this guide. On Ubuntu 22.04 the installation command is
apt install bridge-utils libguestfs-tools libosinfo-bin libvirt-clients libvirt-daemon-system libvirt-daemon virtinst qemu qemu-system-x86
On Ubuntu 20.04 or 18.04 the list of packages is slightly different
apt install bridge-utils libguestfs-tools libosinfo-bin libvirt-daemon libvirt-daemon-system qemu-kvm qemu-system virtinst virt-top
apt install bridge-utils libvirt-bin qemu qemu-kvm
This will install a rather large number of new packages on your host. Finally, it will be capable to serve virtual machines.
5.2. Load the virtual network module
Next step is to load the vhost_net module into the kernel and make it available permanently. This increases the efficiency of networking for the virtual machines as more work can be done in kernel context and data can be copied less often within the system. Issue two commands:
modprobe vhost_net
echo "vhost_net" >> /etc/modules
The libvirtd daemon should already be up and running at this point. If this is for any reason not the case, start and enable it with the usual systemctl commands or whatever the init system of your host server requires to do this.
|
Do NOT install dnsmasq on Ubuntu 20.04
If you look into the start messages with Ubuntu 22.04 does not seem to have this quirk. Note that even if you do not install dnsmasq, you will have a |
5.3. Create a non-root user on the system.
To simplify installation and administration of your virtual machines, you should add a "normal" user to the system and allow that user to administrate the virtual machines.
-
Create the user with
adduser --disabled-password --gecos "<user name>" <login>. -
Add the user to the
libvirtgroup withusermod -a -G libvirt <login>.. -
Put your ssh public key into
.ssh/authorized_keysof the user.
You should perform a final reboot after these steps to be sure that everything works together correctly and comes up again after a reboot.
Well, that’s it! Our system can get its first virtual machine!
6. install-kvm-host.sh: Install the physical host automatically
As mentioned before, you can perform most parts of the installation of the physical host by the install-kvm-host.sh script which is included in the source code archive of this guide.
6.1. The general process
Currently, install-kvm-host.sh can only be used if
-
the target system is a Hetzner root server and
-
it has a freshly installed Ubuntu 22.04.
In this case, generally perform the following steps:
-
Install the server with Hetzner’s
installimagescript as described in the Initial setup of the host system at Hetzner’s section. -
Download the script from the github repository of the IPv6 First Guide (or clone the repo).
-
Copy it somewhere below root’s home directory on the target server.
-
Execute the script as root on the target server.
-
Add the DNS entries for the physical host.
The script will perform all the steps described in the previous sections. The steps are grouped into three stages:
-
Prepare general environment and the networking settings of the physical host.
-
Install and configure Tayga, bind, and radvd.
-
Install libvirtd and finish the setup.
In normal operation mode, install-kvm-host.sh will reboot the server between these stages to ensure a stable, predictable configuration.
On the system I developed and tested the script, the stages needed the following time:
| Stage | Duration |
|---|---|
1 |
~3,5 minutes |
2 |
~1 minute |
3 |
~5 minutes |
The main part of the time is actually spent downloading the needed packages. The configuring steps only need some seconds in each stage.
My server also needed up to 7 minutes for each reboot. The reason for these delays is unknown. Hopefully this is special to that hardware.
As the system reboots in between, the connection to the console is lost. The script logs all console output also to /var/log/install-kvm.log so that one knows what actually happened and whether any errors occurred.
Currently, discovering the end of the script’s operation is done by monitoring the server. If it has rebooted three times, the script has finished. If it has been successful, there is neither a /var/lib/install-kvm/config nor a /var/lib/install-kvm/stage file. In any case, /var/log/install-kvm.log contains the output of all (executed) script stages and ends either in a success message or with an error message describing what went wrong.
6.2. Operation modes
install-kvm-host.sh has three operation modes:
- normal interactive
-
After evaluating the command line parameters, a summary is shown. The script only continues after the user presses Return.
- no reboot
-
The script performs as in normal interactive mode but does not reboot automatically after each step. It’s up to the user to do so and call the script manually after each reboot again. This allows to control the script’s operation in each stage on the command line.
The parameter
-nrb,--no-rebootor--norebootinvokes the no reboot mode. - batch
-
The script does not wait for the user pressing Return but immediately starts the operation if the parameters are valid. This can be used in automated scenarios, e.g. execution by an Ansible scriptbook.
The parameter
-bor--batchinvokes the batch mode.
6.3. Optional operations
Currently, install-kvm-host.sh knows about two optional operations:
-
Setting the timezone: If a
-tzor--timezoneparameter is given (e.g.-tz "Europe/Berlin", the script sets the time zone of the physical host in the first stage using thetimezonectlcommand of systemd. Hetzner’sinstallimageinitializes the time zone always as UTC so it could make sense to correct this. -
Creating an additional user: If a
-lor--loginparameter is given (e.g.-l dh), An additional user is created at the end of the installation process. This user is added to thelibvirtgroup and gets root’s list of authorized ssh keys for login. If a-nor--nameparameter is given (e.g.--name "Dirk Hillbrecht"), it will be used as the name of the user (otherwise the name is set to the login).
6.4. How it works
install-kvm-host.sh is a lengthy Bash script. It has some nice features which are described a bit more in depth here
6.4.1. Continuation over a reboot
To continue operation after a reboot, the script registers itself with the atd daemon and sets the execution time to "now". To prevent atd from executing the script before the reboot actually happens, install-kvm-host.sh simply suspends atd before registration. The whole process goes like this:
myself=$(readlink $0)
systemctl stop atd
echo "$myself" | at now 2>/dev/null
( sleep 5 ; reboot )&
exit 0
On startup, atd is launched again, finds the command which is scheduled in the past (now at the moment of insertion) and executes it. install-kvm-host.sh finds the stage to continue with in /var/lib/install-kvm/stage.
An important point is to carry the command line parameters over the reboot, too. This is done by writing the parameters as export statements into /var/lib/install-kvm/config and source this file at the beginning of all follow-up stages:
if [ "$currentstage" = "1" ]
then
  while [ -n "$1" ] ; do
    case "$1" in
    -l|--login) shift ; export login="$1" ;;
    esac
    shift
  done
  rm -f $conffile && touch $conffile
  echo "export login=\"$login\"" >> $conffile
else
  . $conffile
fi
6.4.2. Obtaining network parameters
install-kvm-host.sh calls ip to read several network settings.
However, it uses then JSON mode ip -j to get the information as a structured JSON document and parses it with the command line tool jq:
# returns the name of the network interface which has the public route
publicInterface() {
  ip -j route | jq '.[] | select(.dst=="default") | .dev' | sed 's/"//g'
}
For YAML files, there is a similar tool yq:
# Read the DNS forwarders from the Netplan configuration
getForwarders() {
  cat /etc/netplan/01-netcfg.yaml | \
  yq -o y '.[] | .bridges.br0.nameservers.addresses')"
}
Unfortunately, yq is not available as an Ubuntu/Debian .deb package in the distribution so far, so install-kvm-host.sh installs it directly from the yq distribution archive. As yq is written in Go, it is distributed as a self-contained binary.
6.4.3. man-page generation
install-kvm-host.sh contains its own man-page as an Asciidoc document. It can be generated by calling the script with the --asciidoc parameter. An Asciidoc processor creates the man page with its output. The --help parameter just calls man $(basename $0) or, if the man page has not been generated, directly emits the result of $0 --asciidoc:
[ "x$1" = "x--asciidoc" ] && { cat <<EOA
= `basename $0`(1)

== NAME

`basename $0` - Transforms a Hetzner root server into a KVM physical host with IPv6-first approach for the virtual machines.
[...]
EOA
exit 0 ;
}
[ "x$1" = "x-h" -o "x$1" = "x--help" ] && { man `basename $0` || $0 --asciidoc | less ; exit 0 ; }
6.4.4. Output to log file
install-kvm-host.sh uses tee to pass the standard output not only to the console, but also to /var/log/install-kvm.log. This is applied on the highest level function call so that all output of the executing functions is appropriately passed to all receivers.
performStage "$currentstage" | tee -a $logfileThe virtual machines
7. Overview on virtual machines
At this moment, we have a fully operational IPv6 autoconfiguration environment. Every modern operating system will configure itself and have full IPv6 connectivity.
Additionally, through the NAT64/DNS64 address translation layer, all the IPv6-only virtual machines will be able to access IPv4-only servers seamlessly and also without any additional configuration requirements.
7.1. Initializing a virtual machine
Installing a virtual machine might sound difficult to you if you have never done this before. In fact, it is not. After all, it is even simpler than the remote installation on a hosted system once you get used to it. On the physical machine, you are dependent on what the hosting provider offers as installation procedures. KVM offers you more or less a complete virtualized graphical console which allows to act just as you were sitting in front the (virtual) computer’s monitor. This way, you can install whatever you like.
Furthermore, if you make a configuration mistake on the physical host, you might end with a broken machine. If this happens in a virtual machine, you have several ways to solve the problem: You can connect to the console and log in directly without network access. If the machine does not boot any more, you can even mount the virtual hard disk into the physical machine and try to fix. And if the machine is for any reason broken beyond repair, you can just throw it away and start over with a fresh installation.
I suggest to start with a throw-away virtual machine. It will not contain any "real" services but only show any remaining problems in the setup. Furthermore, it allows to test and learn the whole process of installing a virtual machine in the setup:
-
Copy the installation ISO image for the system to install onto the host.
-
Connect to the KVM system using
virt-manager. Of course, you might also use another client, but I find this rather easy. -
Use the ssh connection of the normal user created on the host.
-
Start the host creation.
From hereon, things become rather standard. We’re now in the process of installing a guest system on a KVM host. My best practices are these:
-
Assign as many CPUs to the virtual machine as the hardware has. Only if you suspect the virtual machine to grab too much resources, reduce the CPU number.
-
Use cow2 image file for the virtual harddisk. It is the most flexible way once it comes to migrating the virtual machine and today’s file systems can cope with the double indirection quite well.
-
Give the virtual machine definition the same name the system will later have.
The one interesting point is the network configuration at the very end of the definition process. Here, enter the "Network selection" before creating the machine. Select "Bridge device" as network type and give the name of bridge which is br0 in our setup:
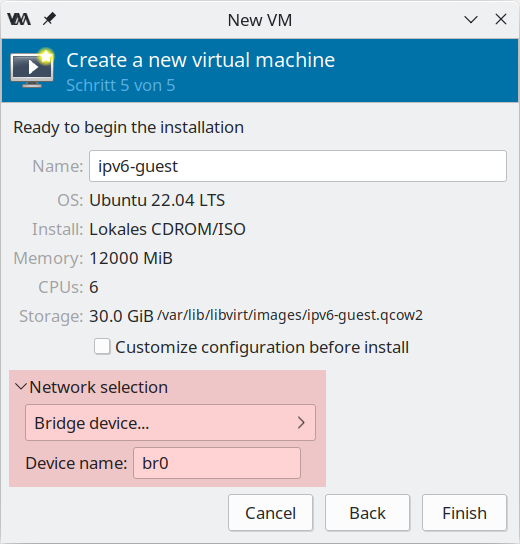
|
Network dialog in older versions of virt-manager
virt-manager versions included in Ubuntu before 22.04 organized the network selection dialog slightly different. You just select "Name of common device" and give the bridge’s name there. 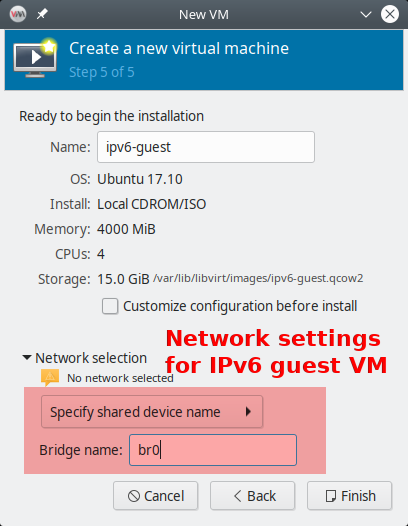
Figure 4. Select the network device in older virt-manager
|
If you are ready, press "Create" and summon your first virtual system.
7.2. DNS and auto-boot
To work with the long IPv6 addresses conveniently, DNS is almost mandatory. You should enter the virtual machine now into the domain.
-
Find the virtual machine’s IP address. On Linux systems,
ip adoes the job. You may also derive it manually from the virtual machine’s MAC address (as SLAAC uses it, too). -
Create an entry in the DNS zone of the system. Note that you only enter a
AAAArecord, not anArecord for an IPv4 address. The system just has no IPv4 address… -
In my opinion, it makes also sense to always create a reverse IP entry for IPv6 hosts. If for any reason your DNS AAAA entry vanishes, you still have the reverse IP entry which assigns name and IP address. Reverse IP entries are always managed in the DNS realm of the IP network owner. In my case, they are edited in Hetzner’s robot interface.
The SLAAC mechanism derives the IP address from the MAC address of the virtual machine. So, it will be static even though it has nowhere been configured explicitly.
If you want your virtual machine to be started automatically if the physical host starts up, you have to set the corresponding flag in the KVM configuration. In virt-manager, you find it in the "Boot options" for the virtual machine.
7.3. Adding an IPv4 address to the virtual machine
The first advice for this topic: Don’t do it!
Your virtual machine is fully connected to the internet any can be reached from anywhere and for any service. The only restriction is that a connecting party must use IPv6. Most systems, however, are connected by IPv6 these days.
Even if the virtual machine hosts a service which must also be accessible by IPv4-only clients, a direct IPv4 connection for the virtual machine is not mandatory. Especially for HTTP-based services, we will configure a reverse proxying scheme on the physical host which allows transparent connections to IPv6-only web servers on the virtual machines for IPv4-only clients. So, only configure a direct IPv4 connection into a virtual machine if it runs a service which requires it.
In the provider-based scenarios, the provider has to assign an additional IPv4 address to the physical host. Then, the physical host must be configured in a way that it passes the IPv4 address to the virtual machine. Finally, the operating system on the virtual machine must handle these connections. Do like this:
Obtain an additional IPv4 address for your server from your hoster. If you already have a network of them assigned to your server, you can use one of those, of course.
|
Provider-dependent setup
The actual setup depends on the network scheme of your provider. Hetzner Online implements a direct peer-to-peer routing of IPv4 addresses. We continue based on this setup.
|
7.3.1. The physical host
If the physical host is configured with Netplan, add the route to the virtual guest explicitly:
root@merlin ~ # cat /etc/netplan/01-netcfg.yaml
network:
  [...]
  bridges:
    br0:
      [...]
      addresses:
        - 241.61.86.241/32
        - 2a01:4f8:1:3::2/64
      routes:
        [...]
        - to: 241.61.86.104/32  # <-- IPv4 address of the virtual machine
          via: 241.61.86.241  # <-- IPv4 address of the host
[...]
After adding these entries, use netplan try to test the changes. If the configuration still works (countdown may stall for 4 to 5 seconds), press Enter and make the changes permanent.
|
More information needed
There is not that much information about Netplan-based network configuration stuff in the internet, unfortunately. Let me know if this configuration did not work for you.
|
On a physical host with systemd-networkd setup, add an entry to the bridge device configuration. In the description above, this is the file /etc/systemd/network/21-br0-conf.network. Add the following lines:
[Address]
Address=<IPv4 address of the host>
Peer=<IPv4 address for the virtual machine>
There are two [Address] entries now in this file which both have the same Address but different Peer entries. That’s intentional.
After having changed the configuration, reload the service via systemctl restart systemd-networkd.
7.3.2. The virtual machine
On the virtual machine, add the IPv4 address to the Netplan configuration, usually in /etc/netplan/01-netcfg.yaml. It reads completely like this:
network:
  version: 2
  renderer: networkd
  ethernets:
    ens3:
      dhcp6: yes
      addresses: [ IPv4 address for the virtual machine/32 ]
      routes:
        - to: 0.0.0.0/0
          via: IPv4 address OF THE PHYSICAL HOST
          on-link: true
|
The physical host is the IPv4 default route!
Note that - at least in the Hetzner Online network - it is crucial that you declare the physical host as the default route for IPv4 traffic from the virtual machines! If you set the gateway given by Hetzner, traffic is not routed. In this case, you can reach the guest from the host but not from anywhere else via IPv4.
|
On the virtual machine, you can apply your changes with netplan try and pressing Enter, too. You can check the IPv4 routes after that which should only show one entry:
# ip -4 r
default via <IPv4 address of physical host> dev ens3 proto static onlink
|
Information on systemd-networkd-based setups missing
I have not configured systemd-networkd-based virtual machines so far, so I do not know how to set them up correctly. But it should be easy as only a static address and gateway entry is needed.
|
Depending on the installation routine of the operating system, there could be another thing to change. Check whether your /etc/hosts contains a line
127.0.1.1 <name of virtual machine>
This might have been added during installation as your system had no IPv4 connectivity at all at that stage. Now that you have full IPv4 connectivity, this can be misleading to some systems. Exchange it with
<IPv4 address of virtual machine> <name of virtual machine> <name of virtual machine>.<domain of virtual machine>
e.g.
1.2.3.4 virthost virthost.example.org
Finally, add DNS and reverse DNS entries for the IPv4 address for the virtual machine. Now, it is directly accessible by both IPv4 and IPv6 connections.
7.3.3. Name service on IPv4-enhanced virtual machines.
If you have not defined DNS64 access control lists in the bind9 configuration on the physical host, an IPv4-enhanced virtual machine will still connect to IPv4-only servers via IPv6! The reason is the DNS64-enhanced name server. It will deliver IPv6 addresses for such servers and the outgoing connection will be established through the NAT64 gateway.
Normally, this has no drawbacks. We install the IPv4 connectivity only for clients which need to connect to a service on the virtual machine via IPv4 - and this is the case with the configuration described above. Remember that the whole NAT64/DNS64 magic happens at the DNS layer. My advice is to generally keep it this way and let the virtual machines use the address translation scheme for IPv4 connections anyway.
There are exceptions to this rule, however. The most remarkable one is if the virtual machine becomes an e-mail server. In this case, it must establish outgoing connections to IPv4 servers via IPv4 or otherwise its connections are blocked. In such a case, exclude the virtual machine in the physical host’s DNS configuration:
acl dns64clients {
   !2a01:4f8:1:2:a:bc:579:a; # IPv6 address of virtual machine
   # Add more if needed (with prepended "!")
   [...]
   any;  # Grant access for all others
};

options {
        [...]
        dns64 64:ff9b::/96 {
                clients { dns64clients; };  # Refer to the ACL defined above
        };
};
If IPv4 enhancement and direct IPv4 access is the norm for your virtual machines, you may also define the access control list the other way around. See the section on DNS64 ACLs.
7.3.4. About IPv4 auto-configuration
This setup assigns IPv4 addresses statically. One could argue that the usual auto configuration setups like DHCP and MAC-address-based IP address assignment should be used. This would, of course, be possible.
I opted against such setups as I don’t think that they are necessary. The setup described here is based on IPv6 and it can be run as IPv6-only setup. For IPv6, we have complete connectivity and auto-configuration - which is even completely static so no configuration entries are needed for individual machines.
The complexity of IPv4 setups comes from the workarounds established against its limitations, most notably NAT setups and addresses from some local address ranges.
All this is not needed any more with IPv6!
My strong advise is: Use IPv6 as the standard protocol for everything you do on all your systems. Take IPv4 only as bridge technology for the legacy parts of the internet. Only assign one single IPv4 address to your virtual machines if you absolutely must.
And for such a setup, you do not need fancy autoconfiguration. Just enter the address on the physical host and the virtual machine and you’re done. If somewhen in the future, IPv4 connectivity is not needed any more, throw it away.
It’s much simpler and less error-prone than administrating additional DHCP servers and configuration files.
7.4. Network detection delays with systemd-networkd
On some systems, namely Ubuntu 20.04, systemd-networkd has a problem detecting that all networks came up on boot of the virtual machine.
Typical symptoms are
-
More than two minutes boot time even though the virtual machine becomes ready some seconds after a reboot command.
-
/etc/rc.localis executed with a mentionable delay. -
Services like the firewall are only activated minutes after the reboot.
-
systemd-networkdwrites something likeEvent loop failed: Connection timed out
into the syslog.
If you face such symptoms, check if systemd-networkd is the reason. Just run as root on the command line:
# /usr/lib/systemd/systemd-networkd-wait-online --timeout=3
If this command issues the mentioned Event loop failed error message on the command line after 3 seconds, you have this problem.
The actual reason for this problem is a bit unclear. There seem to be some glitches in the way systemd-networkd detects the network availability in virtual machines under certain circumstances.
However, as the virtual machines do not have more than one network anyway it is enough to wait until any network of the machine became available. Issue
# /usr/lib/systemd/systemd-networkd-wait-online --timeout=3 --any
It should return immediately without error message.
To make this workaround permanent, change the configuration of the systemd-networkd-wait-online service. There is a default way of doing this in systemd:
-
Copy the service configuration from the maintainer’s systemd configuration into the user-editable systemd configuration:
cp /lib/systemd/system/systemd-networkd-wait-online.service /etc/systemd/system/systemd-networkd-wait-online.service
-
Open
/etc/systemd/system/systemd-networkd-wait-online.servicein an editor. -
Look for the line
ExecStart=/lib/systemd/systemd-networkd-wait-online
in the
[Service]section. -
Append the
--anyparameter:ExecStart=/lib/systemd/systemd-networkd-wait-online --any
-
Run
systemctl daemon-reloadso that systemd uses your user-driven service configuration instead of the one from the maintainer.
You’re done! Rebooting the virtual machine should now be a question of seconds instead of minutes.
8. Operating-systems in the virtual machines
You can install any operating system which is capable of running in a virtualized setup. Of course, it must be able to use IPv6 and it should be able to auto-configure its network settings via SLAAC. Fortunately, all modern operating systems support such setups nowadays.
One very nice thing about virtualisation is that you can install the operating system in the virtual machine just as if you sat in front of the machine’s console. KVM virtualisation and virt-manager forward a (virtual) keyboard, mouse and screen so that you can interact with the system even when it has no internet connection - which is the usual situation during the initial installation of the operating system. This makes you completely independent of the hosting provider and allows you to install any operating system in your virtual machine (as long as it supports IPv6 and SLAAC).
8.1. Ubuntu 22.04
In this section, I give some advises for the Ubuntu 22.04 installer. Note that Ubuntu has changed the installer completely compared to Ubuntu 20.04 so the menu is much different.
-
Select the language for the installed system. I often go for "English" to have error messages and general dialogs in the most common locale. Note that you can change the main locale settings even after installation using
dpkg-reconfigure locales. -
The installer might offer a newer version of itself. I suggest to go for it. The following documentation is for version 22.12.1 of the installer.
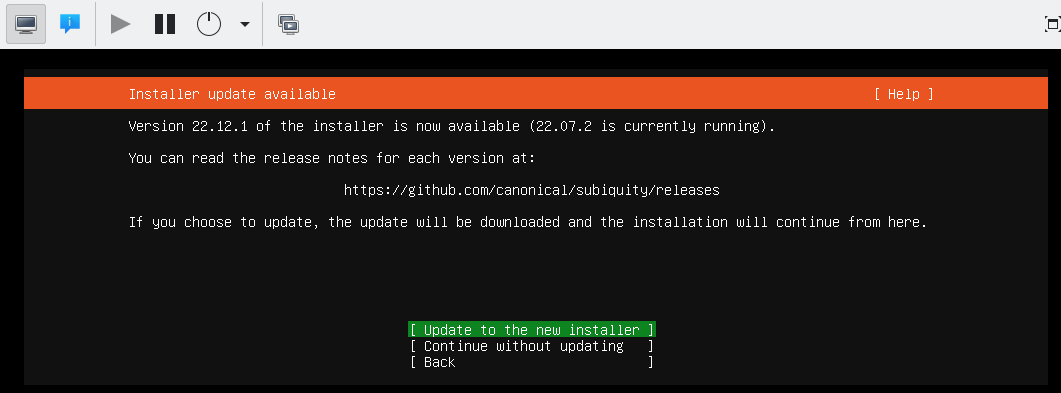 Figure 5. Subiquity in-installation upgrade
Note that upgrading the installer at this point already uses the internet connection of the virtual machine. And as the download server is an IPv4-only-connected Github system, this even includes NAT64 and DNS64. If this update succeeds, you can assume radvd, bind, tayga, and the network bridge to work correctly.
-
The choice of the keyboard should reflect the actual physical keyboard you are typing on.
-
I use the "normal" Ubuntu Server, not the minimized version, as I intend to login on my virtual machines.
-
Installation of SLAAC-driven IPv6 networks cannot be selected explicitly with the current version of Subiquity. I suggest not to change the settings here, so to keep IPv4 to "DHCP" and IPv6 to "disabled". IPv6 SLAAC auto-negotiation will be performed nevertheless. Note that you must not disable both protocols as the whole network interface will be disabled then.
-
No proxy needed.
-
In Hetzner’s network, use
http://mirror.hetzner.de/ubuntu/packagesas download server address. -
You can use the entire disk as installation target, and I suggest to disable the LVM feature here. Note that if you configured your physical host with a (software) RAID setup, the virtual machine will benefit from this, too, as its (virtual) harddisk is actually a file on this RAID.
-
After installation start and selection of a user name, the installer asks if it should install an ssh server. I stongly suggest to do so! Without ssh, you can only access the system via the virtual console - and that just does not make too much fun.
-
In the installation progress screen, you can switch to "View full log" at the bottom of the screen to see what’s happening on the virtual machine. Especially "downloading and installing security updates" might take some time, depending on the age of your installation image.
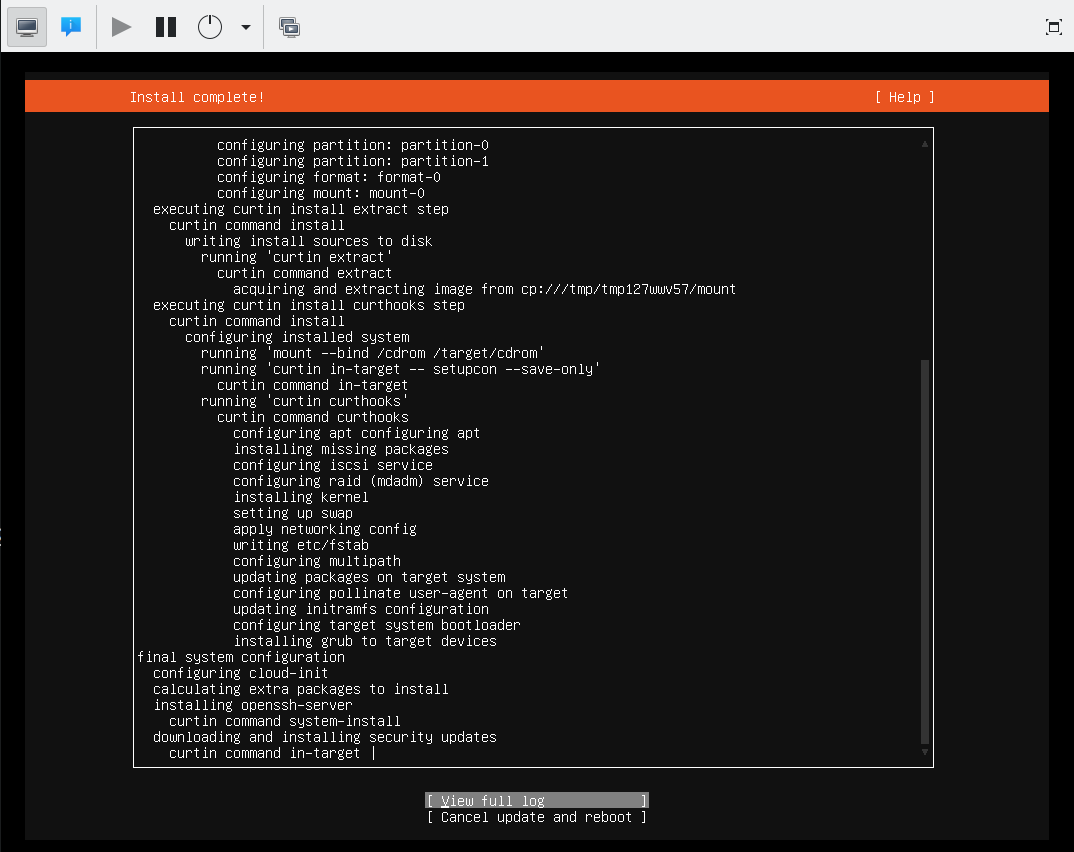 Figure 6. Installation of security updates in Subiquity
Wait for this step to finish, otherwise your installation will not be complete!
If you install the system from the "Create virtual machine" screen, the install ISO image will be removed from the boot device sequence of the virtual machine automatically. However, if you installed the system into an already existing virtual machine, you have to do that yourself. This change will only be applied if you turn off the virtual machine completely and restart it from scratch (e.g. in virt-manager). Rebooting the operating system within the virtual machine is not enough!
Subiquity writes an extremly stripped down Netplan configuration into /etc/netplan/00-installer-config.yaml. It contains no information about IPv6 autoconfiguration; it seems that SLAAC is always performed, even if not explicitly mentioned. If you left the default network settings as they were, however, there is a line enabling DHCP for IPv4. I suggest to disable this by setting it to false. Note that you should not remove all lines completely as there must be at least one entry for an active network device in the Netplan configuration.
# 'subiquity' network config, changed for IPv6-only hosts
network:
  version: 2
  ethernets:
    enp1s0:
      dhcp4: false
8.2. NixOS 22.11
|
Heavy under construction
NixOS instructions have been added only recently. They are far from finished and even more subject to change than the rest of this document!
|
NixOS follows a unique declarative configuration style. The whole system is configured by a static description which is rolled out by "nix", a kind of preprocessor and package manager. NixOS offers capabilities as atomic updates and per-package dependency chains, i.e. it allows to have multiple versions of libraries and even programms installed in parallel.
8.2.1. Network configuration
NixOS networking can be configured like this to work with the IPv6-first setup:
{ config, pkgs, ... }:

let
  device = "enp1s0"; # <- Set this to the actual network device
in {
  networking.tempAddresses = "disabled";
  systemd.network = {
    enable = true;
    wait-online = {
      anyInterface = true;
      extraArgs = [ "--ipv6" "--interface=${device}" ];
      timeout=3;
    };
    networks.${device} = {
      enable = true;
      DHCP="ipv6";
      ipv6AcceptRAConfig = {
        DHCPv6Client = "always";
        UseDNS = true;
      };
    };
  };
}
You have to change the device setting at the beginning to name the actual device in your system.
Note that the systemd.network.wait-online service is notoriously problematic.
I tamed its unwillingness to detect successful network configuration by setting
-
anyInterfaceto true, -
explicitly constraining it to IPv6 and the specific interface with the
extraArgs -
decreasing its timeout vastly.
Almost surely this can be simplified considerably. It has to be evaluated further.
After all, include the /etc/nixos/network.nix file into the main configuration in /etc/nixos/configuration.nix:
{ config, pkgs, ... }:

{
  imports =
    [
      [...]
      ./network.nix
      [...]
    ];

  [...]
}
With this, the interface should be initialized correctly with the IPv6 address derived from the virtual MAC address:
# ip a
[...]
2: enp1s0: <BROADCAST,MULTICAST,UP,LOWER_UP> mtu 1500 qdisc fq_codel state UP group default qlen 1000
    link/ether 52:54:00:ba:b4:bf brd ff:ff:ff:ff:ff:ff
    inet 169.254.132.92/16 brd 169.254.255.255 scope global noprefixroute enp1s0
       valid_lft forever preferred_lft forever
    inet6 2a01:4f8:1:3:5054:ff:feba:b4bf/64 scope global mngtmpaddr noprefixroute
       valid_lft forever preferred_lft 14249sec
    inet6 fe80::5054:ff:feba:b4bf/64 scope link
       valid_lft forever preferred_lft forever
Note that change to the network configuration are applied by nixos-rebuild switch as given.
This could lead, however, to a connection loss if the configuration changes "too much".
You should consider applying these changes via a console connection to the virtual machine.
8.2.2. Anything else
For the rest, you can follow the standard NixOS manual install instructions. Some notes:
-
Use the minimal ISO image without graphical installer at the bottom of the NixOS download page. Command line rulz!
-
There should be no need to configure the installation network manually. The NixOS install environment works nicely together with our IPv6-first setup.
-
KVM/QEMU environments do not offer (U)EFI, so follow the BIOS/MBR-based partitioning instructions.
-
The suggested partition scheme with one big partition for all actually makes sense.
-
To shutdown the system, use the
poweroffcommand.haltwill not shutdown the QEMU environment leaving the virtual machine in limbo. -
NixOS boots and reboots really fast!
8.3. Ubuntu 20.04
For Ubuntu 20.04, I advise these steps:
-
Install by simply pressing the "Install" button. I never needed any additional kernel parameters.
-
Select correct keyboard or it will drive you nuts.
-
Network autodetection will idle around when looking for the non-existing DHCP server. Keep calm. Apart from that, it will simply setup everything correctly.
-
Enter the hostname, preferrably the same as the name of the virtual machine to keep it simple…
-
Check whether you provider has their own mirror for the installation server. Hetzner has, therefore you can save download time:
-
Go to top of mirror list and press
enter information manually -
For Hetzner:
mirror.hetzner.de. This server also works also with IPv6. But even IPv4 servers would be possible due to our NAT64/DNS64 setup. -
Set directory for the Hetzner server to
/ubuntu/packages/
-
-
You do not need a HTTP proxy.
-
Install should start.
-
I suggest to not partition the virtual hard disk in any way. It is not needed.
-
Everything else is as usual. In the software selection, you should at least select the "OpenSSH server" so that you can log into the system after installation.
As this is Ubuntu 20.04, this machine uses netplan for network configuration. It has a very simple definition file in /etc/netplan/01-netcfg.yaml:
# This file describes the network interfaces available on your system
# For more information, see netplan(5).
network:
  version: 2
  renderer: networkd
  ethernets:
    ens3:
      dhcp6: yes
Netplan summarizes router advertisement in the "dhcp6" statement. You do not need to change anything here.
Note that after (re-)booting the virtual machine, it may take some seconds until it has configured its network interface. Once it has done so, everything should work without problems.
Check if you have the network setup delay problem after reboots and fix them as described in the referenced section.
8.4. Ubuntu 18.04
Ubuntu 18.04 is installed exactly the same way as Ubuntu 20.04.
8.5. Windows 10
Windows "just works" when installed in an IPv6-only virtual machine.
It takes all the advertisements from radvd and configures its network appropriately.
The result is a Windows which has no IPv4 network aprt from the auto-configured one.
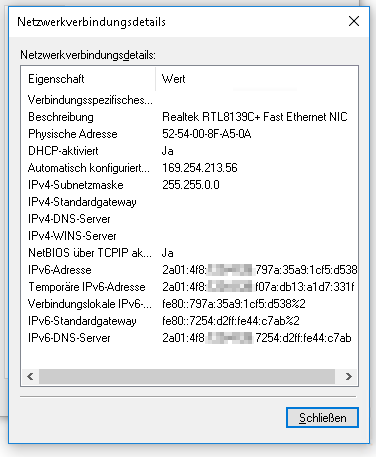
Services
So far, we have described how to setup the basic operating systems for physical host and virtual machines. Usually, servers are installed to run services.
The whole idea of a virtualized setup is to use the physical host for almost nothing and run the services in the virtual machines. So, if not explicitly stated otherwise, the following instructions always assume that you work on a virtual machine.
Having IPv6-centric - or ideally IPv6-only - virtual machines, running serices on them brings one or the other interesting configuration detail. In the following chapters of this guide, we look at a number of different services and describe these details.
Perhaps the most important key concept for working with a setup like this is: Don’t be shy about adding yet another virtual machine!
A tremendous advantage of the setup described here is that installing another virtual machine is really cheap! You do not need to care about scarce IP addresses - with IPv6 you literally have as many as you want! Also, virtualized servers are quite lean these days, it does not really matter if you have three services in three virtual machines or in one - or on bare metal.
So, use virtual machines as your default way of doing things! Install your services in different machines if you want to separate them. One service wants a special operating system environment? No problem, just put it into its own virtual machine!
And if you find out that a service is not needed any more - no problem. Just shut down the virtual machine and it is gone. Delete it - and the service will never come back. You totally garbled the configuration? Delete the virtual machine and start over.
Virtualisation makes administation of services remarkably more flexible than having "everything in the same environment".
9. SSL certificates with Let’s Encrypt
|
This chapter is not polished so far
This chapter still work at progress at some points.
While the overall scheme works reliably, there are still rough edges.
As SSL connections are crucial for all other services and Let’s encrypt is a very good source for them, I released this guide nevertheless.
Feel free to use other schemes or resources for your certificates or help increasing the quality of this chapter.
|
Today’s internet requires encrypted connections for any serious web service. Encrypted connections require certified encryption keys. Such certificates must be issued by a trusted certificate provider. "Let’s encrypt" is such a provider which grants the certificates for free.
9.1. The basic idea
Lets recap shortly how SSL works:
-
You have a secret key on your (web) server which to setup encrypted connections with clients.
-
You have a certificate from a 3rd party which confirms that this key is actually yours and which contains information a client needs to encrypt messages your secret key can decrypt (and vice versa).
-
You send that certificate to a client which connects to you.
-
The client evaluates the certificate to gain information about the key to use and to read the confirmation that the information is valid.
-
Therefore, the client also must trust the 3rd party which certified the key above.
The mentioned 3rd party is the certification authority (CA). To issue a valid certificate, it must answer two questions positively:
-
Is the key really your key? This problem is solved cryptographically by so-called "certificate signing requests (CSRs)". They guarantee cryptographically that the issued certificate can only be used with the key it is created for.
-
Is it really you? For long time, this was the way more difficult problem as there were no simple technical ways to determine that someone is really the person they claim.
Let’s encrypt, however, uses a completely automatable workflow which is based on so-called challenges. The protocol and scheme are called "ACME" and work this way:
-
You: Hey, Let’s encrypt, please certify my key for example.org.
-
Let’s encrypt: Ok, to prove that you have example.org under your control, perform a challenge. Only someone with sufficient rights can do it and that I can check it afterwards.
-
You: <Perform the challenge> Done!
-
Let’s encrypt: <Check the challenge> Great. Here’s your certificate
-
You: Thanks. <Copy key and certificate where they are needed>
9.2. Site-specific certificates and HTTP-based challenge
There are different types of certificates. First, you can certify a key for only one special server name, e.g. "www.example.org"; then, only a service which uses exactly this name can use the certificate. This is the type of certificate you read most about when it comes to Let’s Encrypt. Its challenge is rather simple:
-
You: Hey, Let’s encrypt, please certify my key for www.example.org.
-
Let’s encrypt: Sure. Please put a file
/some-path/<unpredictable random name>onwww.example.org. -
You: (Creates the file) Done!
-
Let’s encrypt: (Connects to
www.example.organd GETs/some-path/<unpredictable random name) Found it! Great. Here’s your certificate. -
You: Thanks. (Copies key and certificate into web server’s SSL key store)
The very nice thing about this scheme is that the Let’s-Encrypt server, the Let’s-Encrypt client certbot and your web server can handle out this all on their own.
certbot knows how to configure a local Apache so that it serves the file which the Let’s Encrypt server wants to see.
There are even web servers like Caddy which have this scheme already built-in.
However, for the mixed IPv4/IPv6 setups, this scheme has some shortcomings. It can only be performed on the virtual machine, as only there the web server can change the contents it serves in accordance with the Let’s encrypt certificate request tool. While this would work consistently as Let’s encrypt explains on https://letsencrypt.org/docs/ipv6-support/, the key has to be copied to the IPv4 proxy server. Otherwise, encrypted IPv4 connections are not possible. If for any reason the IPv6 web server is unresponsive and Let’s encrypt falls back to IPv4, the challenge fails and the certificate is not issued.
All in all, I decided against this scheme for all my domains.
9.3. DNS-based challenge and wildcard certificates
In my setup, I use a certificate for any name below example.org.
Such a wildcard certificate is expressed as *.example.org and allows to use the certified key for everything below the domain name, e.g. www.example.org, smtp.example.org, imap.example.org and anything else.
For such wildcard certificates, the HTTP-based challenge is not sufficient. You have to prove that you not only control one name in the domain, but the complete domain. Fortunately, there is a way to automate even this: The DNS entries of the domain.
|
DNS-based challenge for non-wildcard certificates
Of course, you can use DNS-based challenges also for certificates with specific names only.
As you’ll see, our keys will actually be certified for *.example.com and example.com.
Wildcard certificates simplify the management a bit as they are immediately useable for any new names in a domain.
|
Obtaining a certificate for *.example.org works with the following dialog:
-
You: Hello Let’s encrypt, please certify my key for
*.example.org. -
Let’s Encrypt: Ok, please set the String "<long random String>" as TXT record in the DNS domain as
_acme-challenge.example.org -
You: (Changes the DNS entries) Here you are!
-
Let’s Encrypt: (Performs DNS query) Great. Here’s your certificate.
-
You: Thanks. (Copies key and certificate where they are needed)
This works perfectly. There is one tiny problem: The DNS entries have to be changed. And there is no general scheme how to automate this with the usual DNS server system. Many providers do only offer a web-based interface for editing or have a proprietary interface for changes to the DNS entries. And such interfaces tend to give very much power to the caller.
9.4. DNS rerouting
Thankfully, there is a solution even for this problem: A special tiny DNS server which is tightly bound to the whole challenge process and can be programmed to return the required challenge. Such a server exists, it is the "ACME-DNS" server on https://github.com/joohoi/acme-dns.
But this server runs on its own name which might even be in a totally different domain, e.g. acme-dns.beispiel.de.
And here comes the final piece:
The domain example.org gets a static CNAME entry pointing acme-challenge.example.com to a DNS TXT record in acme-dns.beispiel.de.
And _that entry is the required TXT record Let’s Encrypt’s certification server checks for the certificate validation.
The complete scheme with ACME, ACME-DNS and all the routing steps becomes rather elaborate:

This scheme finally allows to automatically obtain and manage Let’s-Encrypt-certified SSL wild card keys. And full automatism is important for the whole Let’s Encrypt scheme as the issued certificates only have rather short validity time ranges: They are only valid for 90 days and can be renewed from day 60 of their validity on. So, each certificate is renewed four to six times per year!
Especially when the number of certificates becomes larger, a manual process is really, really tedious.
9.5. Set up the whole process
Time to bring things together. We setup the following scheme:
-
One system is responsible for gathering and renewing the certificates from Let’s Encrypt.
-
The whole key set is copied to all virtual machines and the physical host so that all web servers can access them.
In my original installation, I chose the physical host as the hub for this scheme. While there is nothing wrong with that technically, it contradicts the rule not to run any unnecessary services at the physical host.
However you do it, first thing you need is the certificate robot certbot. In all Ubuntu versions covered here, the included one is sufficient, so installation is as simple as apt install certbot.
|
About standards and implementations
Technically, it is not 100% correct to say you need "certbot" to communicate with "Let’s encrypt".
Both are implementations of a vendor-neutral standard, so it would be more precise to say you need a "client" to an "ACMEv2 server" where ACME is the acronyme of "Automatic Certificate Management Environment".
As this guide uses Let’s Encrypt and certbot, I stick with these terms.
|
For the ACME-DNS part, you need an ACME-DNS server.
For the moment, I decided to go with the public service offered by acme-dns.io.
As its administrators say, this has security implications:
You use an external service in the signing process of your SSL certificates.
Wrong-doers could tamper your domain or get valid certificates for your domains.
However, as we see, you’ll restrict access to your data to your own server, you are the only one who can change the crucial CNAME entry in your domain and you have an unpredictable account name on the ACME-DNS server.
As long as you trust the server provider, this all seems secure enough to me.
It is absolutely possible and even encouraged by their makers to setup your own ACME-DNS instance, and as the server is a more or less self-contained Go binary, it seems to be not overly complicated. However, this has to be elaborated further.
Finally, you need the ACME-DNS client.
It is a short Python program.
Download it into /etc/acme-dns from its source on github:
# mkdir /etc/acme-dns
# curl -o /etc/acme-dns/acme-dns-auth.py \
    https://raw.githubusercontent.com/joohoi/acme-dns-certbot-joohoi/master/acme-dns-auth.py
Load the file into and editor end edit the configuration at top of the file:
ACMEDNS_URL = "https://auth.acme-dns.io" (1)
STORAGE_PATH = "/etc/acme-dns/acmedns.json" (2)
ALLOW_FROM = ["<IPv4 address of physical host/32", "IPv6 address of physical host/128"] (3)
FORCE_REGISTER = False (4)
| 1 | This is the URL of the ACME-DNS server. The default setting is the public service from acme-dns. |
| 2 | The ACME-DNS client needs to store some information locally.
This setting lets it store its information also in the /etc/acme-dns directory. |
| 3 | During account generation on the server, the client can restrict access to this account to certain source addresses. Setting this to the IP addresses of the machine running the registration process increases security. |
| 4 | The client program will register an account at the ACME-DNS server on first access. If that account should be overwritten somewhen in the future, this variable must be set once to True when running the program. Normally, it should always be False. |
Now you can generate key and certificate for your first domain. Run certbot on a domain to be secured with SSL once manually:
certbot -d example.com -d "*.example.com" \ (1)
        --server https://acme-v02.api.letsencrypt.org/directory \ (2)
        --preferred-challenges dns \ (3)
        --manual (4)
        --manual-auth-hook /etc/acme-dns/acme-dns-auth.py \ (5)
        --debug-challenges \ (6)
        certonly (7)
| 1 | You request a certificate for example.com and *.example.com as the wildcard version does not match the domain-only server name. |
| 2 | The ACME server must be capable of ACMEv2 as ACMEv1 does not know about DNS-based challenges. |
| 3 | We use the DNS-based challenge. |
| 4 | The challenge is performed "manually", i.e. not by one of the methods incorporated into certbot. |
| 5 | However, this "manual" method uses the acme-dns client as hook for the authentication step, so after all it can be performed without interaction. |
| 6 | In this call, however, we want certbot to stop before checking the challenge, because we have to setup the CNAME entry in the example.com domain. |
| 7 | Finally the certbot operation: Issue a certificate. |
Executing this call halts just before Certbot checks the certificate. Instead, it prints the required CNAME for the domain. So, now you have to edit your domain data and add this CNAME.

After the entry has been added and spread through the DNS, let certbot continue.
Only at this first certification process, manual interaction is needed. After that, certbot can, together with acme-dns-auth.py, handle the whole process automatically. You can see the setup in /etc/letsencrypt/renewal/example.com.conf.
For the process of certification that means: Put a call to certbot renew into the weekly cronjobs on the machine and forget about it.
Certbot puts the currently valid keys certificates for a domain into a directory /etc/letsencrypt/live/<domain>. Just use the files in that directory for Apache, Dovecot, Postfix and whatever.
9.6. Copy files to virtual machines
My suggestion is to run Certbot in a centralized way on one machine (in my current setup: the physical host) and copy the complete directory with certbot’s keys and certificates onto all machines which need one of the certificates.
Note that you need the certificates for all your web servers not only on the virtual machine where the web site runs, but also on the physical host which is responsible for the incoming IPv4 connections to the site. It helps to prevent errors if you just copy the complete data set onto all machines at the same place.
So, just copy the /etc/letsencrypt directory to all virtual machines, do not install certbot there.
9.7. Planned extensions and corrections
From all services described in this guide, the Let’s Encrypt setup is the least consolidated one. There are some elements missing to make it really polished:
-
certbotshould run on a dedicated virtual machine and not on the physical host. Implementing it this way was mainly due to me experimenting with the whole setup. -
ACME-DNS should use its own server. I would place it on the same virtual machine where
certbotruns. This way, that special DNS server would only be accessible via IPv6, but the docs say, this is no problem any more in the 2020s. -
The copying process must be enhanced. Currently,
certbotis run by root which is not the best idea of all. There should be a dedicatedcertbotaccount which runs Certbot and is allowed to copy Certbot’s directory to the other machines. -
Some mechanism must restart the services after the new certificates have been rolled out. Currently, the certificate renewal happens somewhen between 30 and 22 days before the old certificate expires. Often, automatic updates (and reboots) restart the Apache or the e-mail services in time. This is not guaranteed, however.
Taking all this into consideration, this section of this guide is the clearest candidate for a larger rewrite.
10. E-mail server
| I have implemented this only with Ubuntu 18.04 so far so this section is not updated to Ubuntu 22.04 yet. Reports on how it works with newer systems are welcome. |
When it comes to a complete personal internet services setup, the single most important service is probably e-mail. It is crucial for many different tasks:
-
Of course, sending and receiving information to and from other people.
-
Having a base for the other services to verify or re-verify authentication - ever tried to reset a password to a service without an e-mail account?
-
Getting information about the health of the own systems or confirmation messages from automatic tasks.
E-mail is important. The question is: Host yourself or use a service? To be clear: Hosting an e-mail server yourself is not a simple task. There is a plethora of - more or less clever - schemes against spamming and fraud and if your server does not follow them, it is quite likely that outgoing messages will simply be blocked or even thrown away by other systems. If you mess up your setup, the same could accidentially happen to incoming messages. And unfortunately, you will not find a tool which you install out of the box so that you just "have" a mail server. You have to configure multiple programs so that they play nicely together.
The advantages, however, are obvious: It’s your own e-mail on your own server. You are not bound to any storage capacities you have to pay for. You can configure the services as you like. If you misconfigure them, it’s your fault and only your fault.
Having said all this, there is one thing that is absolutely impossible today: Running an e-mail server for a domain without an IPv4 address. While this is technically no problem, there are so many e-mail servers out there which are frankly IPv4-only that you are more or less cut off any meaningful e-mail service. And due to the aforementioned anti-spam measures, it is also not possible to use port-forwarding from the physical host into the virtual machine for the IPv4 connectivity. At least, I could not figure out how to do this reliably.
So, unfortunately the very first "real" service I describe in this "IPv6-only" installation guide must be dual-stacked with its own IPv4 address.
|
Remarkably low amount of IPv6 traffic
It is remarkable how small the amount of IPv6 e-mail traffic actually seems to be. This setup creates a mail server which is reachable by IPv4 and IPv6 in absolutely equal manner. However, the actual amount of incoming IPv6 traffic of my own server has been less then 2% as of August 2019. It is a bit devastating…
|
10.1. Basic server and network setup
So, here we are. Start with bringing up a fresh virtual machine as described above. I gave my e-mail server a virtual harddisk of 250 GB - of which 60 GB are currently used. It has 6 GB of main memory. This is rather a lot, but in my setup, there are 64 GB of physical memory in the host. It is no problem…
Perform all steps so that you have your e-mail server-to-be accessible from outside via IPv6 and IPv4 ssh connections with appropriate DNS entries in your domain.
After having the server prepared on network and system level, it is time to actually setup the mail system. And here I must admit, that I have not developed my own scheme. Instead, I followed https://thomas-leister.de/en/mailserver-debian-stretch/. While it uses Debian stretch as base, I also had no problem following it on Ubuntu 18.04.
Thomas describes a contemporary e-mail server setup. The server allows for incoming and outgoing traffic. It is setup according to all anti-spam requirements with DKIP, DMARC and SPF entries in DNS. It offers SMTP and IMAP access for clients. It is a multi-user multi-domain setup. I run this since late 2018 without any problems.
10.2. Setup notes and hints
Using Thomas' description is very straight forward. However, I’d like to add some notes.
First, it helped me tremendously to understand that you should use a totally unrelated domain for the mail server - especially, if you plan to serve multiple domains on it. Let’s assume you want to serve example.net and example.com e-mail on your server. My advise to setup this:
-
Obtain
beispiel.deas an independent domain only for e-mail. For my own setup, I obtained a.emaildomain. It costs a bit more than a simple.dedomain, but it’s really nifty… -
Use this domain as primary domain in the setup documentation.
-
Let the main e-mail name server, usually
mx0.beispiel.de, haveAandAAAADNS entries. After all, this setup works for both IP address spaces. -
Point the
MXentry for any domain you want to serve on your server to thatmx0.beispiel.de. Remember - the MX for a domain can be in any domain! -
After having setup the DNS for the first "real" domain, say
example.net, you can simply copy SPF, DMARC, and DKIP entries from that domain toexample.comand whichever other domain you want to serve. -
Add the IPv4 addresses and the IPv6 network of the whole server to the
mynetworkslist in/etc/postfix/main.cf. That makes your mailserver a smart host for all other servers. So, every of your virtual servers - and even the physical machine - can send e-mail without any further setup steps. You only have to add the mail server as smart host (or forwarding host) for all outgoing e-mail. -
Regarding the DNS setup of the mail server itself: This virtual machine must not use the DNS64/NAT64 setup of the physical host! This server is fully connected to IPv4, so it can reach all IPv4 servers directly. And it must do so, otherwise outgoing IPv4 connections would come from the "wrong" IPv4 address and the whole anti-spam mayhem would start again. The mail server setup instructions suggest to install a small DNS server on the mail server itself. Just follow that instructions and you’re done. If you use the DNS server of the physical host, be sure to exclude this virtual machine from DNS64 by editing the access control list appropriately!
Setting things up like this makes the further DNS setup rather simple: All your mail clients connect to the dedicated mail server domain, in the example mx0.beispiel.de, also those for example.net, example.com or whatever. This way, you only need SSL certificates for the mail domain.
10.3. Consistency of DNS entries
Two things are absolutely crucial regarding the name service setup of the mail server:
-
The DNS and reverse DNS entries for the mail exchange server must be consistent! The
AandAAAArecord formx0.beispiel.demust both point to the virtual server in your setup and thePTRreverse entries of the IP addresses must point back tomx0.beispiel.de. This is the main reason why we need that additional IPv4 address and why I strongly recommend to use a dedicated domain for this. If you make a mistake here, you will have massive problems with outgoing e-mail being spamblocked (and noone willing to help you…). -
It is also important that the
myhostnamesetting in/etc/postfix/main.cfcontains the full qualified domain name of that mail server, i.e.mx0.beispiel.dein this example. The whole mail server is mainly known in DNS by its mail domain name.
10.4. Setup of mail clients
As I already explained, the mail domains which are hosted on the system can have totally different names! There are also no PTR records needed. Each mail domain must match the following conditions:
-
An MX entry in DNS must exist and point to
mx0.beispiel.de. -
The domain and the users must be entered in the data storage for postfix and dovecot (neither reboot nor service restart required after changes). Just follow the setup description of Thomas Leister above.
-
Users set the login name in their mail programs to e.g.
username@example.net. -
They should, as already explained, set IMAP and SMTP server name to the name of the mail server, e.g.
mx0.beispiel.de, not to anything in their actual domain! Even if there are DNS entries pointing to the mail server, there would be massive certificate warnings as the SSL certificates do not contain the mail domains, but only the domain of the mail server.
10.5. Recap
I use this setup since autumn of 2018 without any problems. I’ve also added a number of domains to my server. This takes only minutes, works without problems and covers all kinds of setups like local delivery, delivery to multiple addresses, forwarding, catch-all addresses. It is a really fine thing.
You might miss a webmail interface. I have decided not to add that to the mail server, but to another virtual web servers. Setup of those is covered in the next chapter.
11. Web server
I won’t describe how to set up and configure an Apache or Nginx web server. There is a plethora of such guides on the internet. I will only cover that one small difference between our setup here and the every-person’s server out there:
Our web server in a virtual machine does not have IPv4 connectivity.
Of course, you can say: "I don’t care. People should use IPv6 or they miss the service." If you do that, you’re done. The server works as expected and everything works as long as all connections can be established via IPv6.
Unfortunately, things are not that simple in many cases. There are still many installations which have only IPv4 connectivity, even in 2022. Even if a network is connected via IPv6, it does not mean that every device can use the protocol. E.g. many microcontrollers or legacy devices do only have an IPv4 procotol stack implemented. So, an IPv6-only web server is in itself no problem but even in 2022 it will not be generally reachable.
On the other hand, the whole idea behind this setup is to have IPv6-only virtual machines. It does not help if we have an IPv6-only setup - only to add IPv4 connectivity to each machine due to the services running on them.
Fortunately, for HTTP-based services, there is an elegant solution to this problem: We use a relay which takes IPv4 traffic and forwards it to the IPv6 machine. To be more precise: We use our physical host to relay incoming IPv4 connections to the servers on its virtual machine(s) with a web server configured as reverse proxy. This way, we split incoming connections on different servers based on the protocol:
-
IPv6 clients do connect directly to the web server on the virtual machine.
-
IPv4 clients do connect to the physical host via IPv4 which forwards the connection to the virtual machine via IPv6

11.1. Configure appropriate DNS entries
For this scheme to work, DNS entries must be setup in a special way:
For a web site www.example.org, you define an A record which points to the physical host but an AAAA record which points to the virtual machine.
After all, this is the main idea behind everything which is following now.
|
Different machines for the same name
Note that you should really understand what happens here: www.example.org will lead you to different machines depending on the IP protocol version you use.
If you connect to the machine with this name e.g. via ssh (for maintenance purposes), you might end on the physical host if your workstation has no IPv6 connectivity!
I really strongly suggest that you train yourself to never ever use the DNS names of the web sites for such purposes.
It’s virthost.example.org which carries www.example.org - and if you need to access the machine, you connect to virthost, not to www.
|
For the following examples, we assume that the following DNS entries exist:
physical.example.org A 1.2.3.4  # IPv4 address of the physical host

physical.example.org AAAA 11:22:33::1  # IPv6 address of the physical host
virtual.example.org AAAA 11:22:33::44  # IPv6 address of the virtual machine
11.1.1. Direct DNS records for the web sites
This is the simple approach: You just put direct A and AAAA records for the web servers.
Assuming the entries for the hosts as described above you define the following entries:
www.example.org A 1.2.3.4          # IPv4 address of the physical host
www.example.org AAAA 11:22:33::44  # IPv6 address of the virtual machine
blog.example.org A 1.2.3.4         # same addresses for other services on the same host
blog.example.org AAAA 11:22:33::44
This way, the appropriate name resolution is performed for each protocol and leads directly to the web server in charge.
11.1.2. CNAME entries
The direct approach is very straight forward but has a drawback: You do not see on first sight that these addresses are somehow "special" in that they point to different servers depending on the protocol. And, of course, if for any reason the IP address changes, it must be changed for all entries individually.
Therefore, you can follow a two-step approach: Define A and AAAA entries once for the virtual/physical address pairs and reference them for the individual addresses via CNAME entries:
virtual64.example.org A 1.2.3.4          # IPv4 address of the physical host
virtual64.example.org AAAA 11:22:33::44  # IPv6 address of the virtual machine

www.example.org CNAME virtual64.example.org
blog.example.org CNAME virtual64.example.org
This way, you can even establish the convention to have such an entry with a certain name for each virtual machine, here <machinename>64 for <machinename>.
11.1.3. Common SSL certificates
Clients may establish HTTPS connections via IPv6 and IPv4. Therefore, the HTTP servers on both physical host and virtual machine must have the keys for the domains. You can run the web-server-based certification schemes on the virtual machine or use the DNS-based certification scheme.
Finally, the SSL certificates for your web site must be available on both the virtual machine and the physical host.
We assume the certificates below /etc/letsencrypt.
11.2. Setup on the virtual machine
Install apache2. Then, enable rewrite using a2enmod ssl rewrite. This is needed for encryption and the mandatory redirect from http to https.
11.2.1. Setup a website
Create the configuration, e.g. in /etc/apache2/sites-available/testsite.conf:
<VirtualHost *:80>
    ServerAdmin admin@example.org
    ServerName www.example.org

    # Rewriting everything to SSL
    RewriteEngine on
    RewriteRule ^ https://%{SERVER_NAME}%{REQUEST_URI} [END,QSA,R=permanent]
</VirtualHost>

<IfModule mod_ssl.c>
<VirtualHost *:443>
    ServerAdmin admin@example.org
    ServerName www.example.org

    # SSL certificate location
    SSLCertificateFile /etc/letsencrypt/live/example.org/fullchain.pem
    SSLCertificateKeyFile /etc/letsencrypt/live/example.org/privkey.pem
    Include /etc/letsencrypt/options-ssl-apache.conf

    # Logging
    ErrorLog ${APACHE_LOG_DIR}/www.example.org-error.log
    CustomLog ${APACHE_LOG_DIR}/www.example.org-access.log combined

    # Actual content definitions
    DocumentRoot /usr/local/webspace/www.example.org
    <Directory /usr/local/webspace/www.example.org>
        Require all granted
        AllowOverride All
    </Directory>
</VirtualHost>
</IfModule>
Enable the website using a2ensite testsite.conf. Now, it is available via IPv6. Note that this is more or less the "normal" setup of an Apache-served website.
11.2.2. Prepare logging of IPv4 requests
The Apache web server on the virtual machine sees the requests sent via IPv6 directly and with the correct sender IP address. It can therefore log them correctly. Requests sent via IPv4, however, will be proxied by the physical host and forwarded via IPv6. The virtual server sees them also sent via IPv6 and with the source address of the physical host.
However, the physical host will add automatically an X-Forwarded-For header to the forwarded request containing the original sender address it received the request from.
This automatic addition is triggered as the ProxyPass directive passes an SSL-encrypted incoming connection to an SSL-encrypted proxying target - in which case Apache adds this header automatically.
This allows us to evaluate this original IPv4 source address on the IPv6-only web server.
This is done by Apache's remote IP module which is installed automatically but not enabled by default.
You can activate remote IP handling globally by adding a configuration file /etc/apache2/mods-available/remoteip.conf:
RemoteIPHeader X-Forwarded-For
RemoteIPInternalProxy 1:2:3::8 # IPv6 address of the physical host
After adding this file, run a2enmod remoteip.
It enables the remote IP evaluation module and this global configuration.
This activates evaluation of the X-Forwarded-For header for all virtual hosts on the Apache web server.
Furthermore, it restricts evaluation of the forwarded IP source address to requests coming from our own reverse proxy.
This way, our IPv6-only web server can (and will) log the original IP addresses from requests sent via IPv4 to all virtual hosts.
11.3. Setup the IPv4 reverse proxy on the physical host
Install apache on the physical host, too. You have to enable the proxy modules additionally to SSL and rewrite using a2enmod ssl rewrite proxy proxy_http.
Create the site configuration, also in /etc/apache2/sites-available/testsite.conf:
<VirtualHost *:80>
    ServerAdmin admin@example.org
    ServerName www.example.org

    # Rewrite everything to SSL
    RewriteEngine on
    RewriteRule ^ https://%{SERVER_NAME}%{REQUEST_URI} [END,QSA,R=permanent]
</VirtualHost>

<IfModule mod_ssl.c>
<VirtualHost *:443>
    ServerAdmin admin@example.org
    ServerName www.example.org

    # SSL certificate stuff
    SSLCertificateFile /etc/letsencrypt/live/example.org/fullchain.pem
    SSLCertificateKeyFile /etc/letsencrypt/live/example.org/privkey.pem
    Include /etc/letsencrypt/options-ssl-apache.conf

    # Proxy settings
    SSLProxyEngine on
    ProxyRequests Off
    ProxyPass / https://www.example.org/
    ProxyPassReverse / https://www.example.org/

    # Logging
    ErrorLog ${APACHE_LOG_DIR}/www.example.org-error.log
    CustomLog ${APACHE_LOG_DIR}/www.example.org-access.log combined
</VirtualHost>
</IfModule>
Enable it with a2ensite www.example.org. Now, your website is also available via IPv4.
Note that the Apache on the physical host resolves its proxy target simply as www.example.org. This works as by specification IPv6 name resolution always superceeds IPv4 name resolution. This way, the physical host actually forwards the incoming request to the real server on the virtual machine.
Note that we define the IPv4 redirection server directly on the physical host and not as forwarder to the HTTP-definition in the virtual machine. This way, proxied requests are reduced.
12. Cryptpad instance
Cryptpad is a browser-based collaborative document management which stores all information encrypted on the server. So, even administrators of the server system cannot read the information unless they have a key for access.
We install a complete self-contained cryptpad server on a virtual machine. It is located in one dedicated user account and proxied with an Apache server which takes care for the SSL transport encryption.
In our IPv6-first setup, there is one special problem: Cryptpad uses an additional HTTP/Websocket connection which must be forwarded. Therefore, we modify the setup a bit:
-
Apache is a proxy-only on both the physical host and the virtual machine.
-
The actual cryptpad service runs on port 3000.
-
Access to the "raw" cryptpad is restricted to the local network only.
-
The forwarding Apache on the physical host does not forward to the Apache on the virtual machine, but directly to the cryptpad service.
12.1. Setup firewall and service name
To restrict access to port 3000, we need a firewall.
Ubuntu comes with ufw which does the job.
Install it with apt install ufw.
Then perform the following commands for the basic setup:
ufw allow from 2a01:4f8:1:2::/64 to any port 3000  # Local IPv6 network
ufw allow OpenSSH  # very important, otherwise you are locked out
ufw allow "Apache Full"  # meta-rule for the Apache on the virtual machine
If you have other services on the virtual machine, add their respective ports with more allow commands.
You can get the list of installed application packages with ufw app list.
Note that you do not need a local Postfix instance for cryptpad.
ufw stores the actual firewall rules in files below /etc/ufw.
The app rules defined above get stored in /etc/ufw/user6.rules.
You should not temper that file, stay with ufw commands for configuration.
If everything is in place, change /etc/ufw/ufw.conf and set
ENABLE=yes
To check that everything works as expected, perform ip6tables -L which should be empty now.
Start ufw with systemctl restart ufw and run ip6tables -L again.
Now you should see a rather lengthy list of rule chains and rules, among them the rules regarding port 3000 you gave above.
Test that you can reach the Apache server on the virtual machine.
You should now add the DNS name of your cryptpad instance.
Remember what we said about system names and service names:
The virtual machine Cryptpad will run on is not accessible via IPv4 directly.
Therefore, you need a proxy on the IPv4-accessible physical host of your installation.
As a result, the DNS entries for accessing your Cryptpad instance will point to different servers in their A and AAAA records.
To avoid confusion, use the Cryptpad service entries only for accessing the service and use the name of the virtual machine for maintenance.
This said, add the appropriate entries to your DNS records. We will assume cryptpad.example.com as name for the Cryptpad service in this guide.
12.2. Install cryptpad
| The following configuration description may be outdated as it refers to Cryptpad of late 2018. Please refer to the official documentation in case of any doubt. |
Cryptpad is open-source software. Their producers offer storage space on their own cryptpad servers as business model. Therefore, they are not overly eager to promote independent installations. Nevertheless, it is no problem to run and maintain a self-hosted installation of the software as long as you have some idea about what you are doing.
Start with creating a user "cryptpad" with adduser --disabled-password --gecos "Cryptpad service" cryptpad.
Add your key in its .ssh/authorized_keys file so that you can log into the account.
As user cryptpad, you install some software packages needed by Cryptpad:
-
First is
nvm, follow the instructions on https://github.com/nvm-sh/nvm. -
Log out and in again to have you user-local
nvmaccessible. -
Now install Node.js. In late 2018 [3], Cryptpad used version 6.6.0, so the command is
nvm install 6.6.0
This installs the Node package manager npm and sets paths correctly.
Check it with
$ which npm
/home/cryptpad/.nvm/versions/node/v6.6.0/bin/npm
-
Finally you need
bower. Install it with
npm install -g bower
Now you are ready to actually install Cryptpad.
Stay as user cryptpad and start by obtaining the software:
$ cd $HOME
$ git clone https://github.com/xwiki-labs/cryptpad.git cryptpad
This installs Cryptpad right from its Github repositories.
It’s the default way of installing an independent Cryptpad instance.
Installing this way has the big advantage that updating to a newer Cryptpad version is a simple git pull, followed by the instructions in the version announcement.
Now you perform the basic setup:
$ cd $HOME/cryptpad
$ npm install
$ bower install
These are also the routine steps after an update.
Note that especially the npm install step seems to download "half the internet".
This is expected behaviour.
Cryptpad comes from the Javascript/Node.js sphere and those folks love to use a plethora of library packages which themselves use another plethora of library packages.
Fortunately, subsequent updates will only touch a subset of these libraries…
After installation comes configuration:
$ cd $HOME/cryptpad/config
$ cp config.example.js config.js
Now you edit config.js.
It’s a JSON file and there are three important changes to be performed:
var _domain = 'https://cryptpad.example.com/';
[...]
httpAddress: '<public IPv6 address as in "ip -6 a" of the virtual machine>',
adminEmail: false,
We configure cryptpad itself in a way that it uses it’s domain name in the _domain variable.
httpAddress is the actual address cryptpad starts its own HTTP server on.
To be sure that this happens on the correct interface, we use the actual IPv6 address here.
After this step, Cryptpad is configured completely but not yet started. We come back to this in a moment.
As a final step, you should remove the $HOME/cryptpad/customize subdirectory if you do not really need it.
It will not be updated during updates and might carry outdated information after updates.
12.3. Integrate Cryptpad into systemd
Usually, Cryptpad is a service which runs permanently.
Therefore, it should be started on system startup.
For systemd-controlled servers as any modern Debian or Ubuntu installation, add a systemd service unit file:
[Unit]
Description=CryptPad service

[Service]
ExecStart=/home/cryptpad/.nvm/versions/node/v6.6.0/bin/node \
  /home/cryptpad/cryptpad/server.js
WorkingDirectory=/home/cryptpad/cryptpad
Restart=always
User=cryptpad

[Install]
WantedBy=multi-user.target
Symlink this file into /etc/systemd/system:
ln -s /home/cryptpad/cryptpad.service /etc/systemd/system
Now you can start the cryptpad service:
# systemctl start cryptpad
# systemctl enable cryptpad
The cryptpad server should now be reachable on the virtual machine and on the physical host on its port 3000.
Test it with curl http://cryptpad.example.com:3000/ on both systems.
From any other computer, the service must not be reachable due to the firewall blocking the access.
Test this, too!
12.4. Apache on virtual machine
To make Cryptpad accessible from the outside, we configure an Apache proxy.
For Cryptpad, it needs to proxy websockets, so (as root) run the command a2enmod proxy_wstunnel.
Then, the Apache configuration is rather straight forward:
<VirtualHost *:80>
    ServerAdmin myname@example.com
    ServerName cryptpad.example.com

    # Rewrite everything to SSL
    RewriteEngine on
    RewriteRule ^ https://%{SERVER_NAME}%{REQUEST_URI} [END,QSA,R=permanent]
</VirtualHost>

<IfModule mod_ssl.c>
<VirtualHost *:443>
    ServerAdmin myname@example.com
    ServerName cryptpad.example.com

    # SSL certificate stuff
    SSLCertificateFile /etc/letsencrypt/live/cryptpad.example.com/fullchain.pem
    SSLCertificateKeyFile /etc/letsencrypt/live/cryptpad.example.com/privkey.pem
    Include /etc/letsencrypt/options-ssl-apache.conf

    # Proxy settings, "2a01:4f8:1:2:5054:ff:fe12:3456" is the IPv6 address of the virtual machine
    ProxyPass /cryptpad_websocket  ws://[2a01:4f8:1:2:5054:ff:fe12:3456]:3000/cryptpad_websocket
    ProxyPreserveHost  On
    ProxyPass /        http://[2a01:4f8:1:2:5054:ff:fe12:3456]:3000/
    ProxyPassReverse / http://[2a01:4f8:1:2:5054:ff:fe12:3456]:3000/

    # Logging
    ErrorLog ${APACHE_LOG_DIR}/cryptpad-error.log
    CustomLog ${APACHE_LOG_DIR}/cryptpad-access.log combined
</VirtualHost>
</IfModule>
After that, activate the virtual host:
a2ensite cryptpad
systemctl reload apache2
If everything comes up without errors, you can access your Cryptpad from any IPv6-connected computer. Check that loading a pad actually works, otherwise there is a problem with the forwarding rule for the websocket.
12.5. Apache on physical host
The Cryptpad instance is not yet accessible from IPv4 clients.
For this, you need another Apache proxy on the physical host.
The very nice thing here is that it can be configured exactly as its compaignon on the virtual machine!
So, on the physical host as root do this:
-
Enable the websocket proxy module with
a2enmod proxy_wstunnel. -
Copy
/etc/apache2/sites-available/cryptpad.conffrom the virtual machine to the physical host at the same location. -
Take care that the SSL keys are located at the correct position.
-
Enable the host with
a2ensite cryptpad. -
Activate the configuration with
systemctl reload apache2.
Now, cryptpad can also be reached from any IPv4-only hosts.
Note that on the physical host, you forward to port 3000 on the virtual machine. This is the reason why the port must be reachable from the physical host. Port 3000 on the physical host is totally unaffected from all of this and in fact, you could just install another, independent service there without breaking your Cryptpad on the virtual machine.
The main takeaway from this installation procedure is: If you have a service on a virtual machine for which you configure an Apache (or Nginx or any other HTTP server) as reverse proxy, chances are good that you get IPv4 connectivity by adding another reverse proxy to the physical host (or any other IPv4-connected machine) with exactly the same reverse proxy configuration. A future version of this guide should make this clearer.
Special tasks and setups
13. Testing IPv4 connectivity from an IPv6-connected host
If you work with this setup, you will usually have an IPv6-connected workstation so that you can access your virtual machines without any proxying. That makes it a bit complicated to actually test the IPv4 connectivity of services as IPv6 is by definition always the preferred protocol - if it is available.
At least on Linux systems, switching off IPv6 for testing purposes is not difficult, fortunately:
-
Close all (IPv6) ssh etc. connections! They will be stalled anyway if you turn off IPv6.
-
Check with
ip -6 athat you (still) have IPv6 addresses. -
Perform
echo 1 > /proc/sys/net/ipv6/conf/all/disable_ipv6. This disables IPv6 completely on this computer immediately. -
Check with
ip -6 athat you have no IPv6 addresses any more.
Every and all connections from this computer are performed via IPv4 now.
Remember that ssh-ing to your virtual machines is not possible any more now!
You have to ssh to your physical host (or any other IPv6-connected machine) and only from there open a connection to the virtual machine.
To reenable IPv6, perform the following steps:
-
Perform
echo 0 > /proc/sys/net/ipv6/conf/all/disable_ipv6. This reenables IPv6. -
If you have setup your IPv6 routing to be configured via router advertisements, you will not have IPv6 routing again immediately. The advertisments should arrive within some short time frame but depending on your general setup, you might need to shutdown and restart your network devices for that.
Some services holding IPv6 connections on the system might not behave well if they get cut off their network connectivity so harshly.
If restarting them does not help, you might need to reboot the system to get everything in order again.
Fortunately, just performing some echo commands to /proc files is a volatile operation.
After a reboot, everything about turning off IPv4 this way is forgotten.
14. Static routes between servers
Sometimes, some hosts are interconnected directly additional to the usual link to the network’s general infrastructure. E.g. a database cluster could get such an additional link between the clustered systems. This way, traffic between the machines is undisturbed by any general traffic and strictly kept in the cluster.

With IPv6, such a scheme is extremely simple to setup.
Let’s assume we have those three servers phyA, phyB, and phyC.
Every host has an assigned /64 network and two network cards:
eth0 is connected to the "general infrastructure" and used for accessing the internet, eth1 is connected to some local switch which interconnects all the systems.
If you set up everything as written in this guide, you will have eth0 on the hosts as default path for the packets.
And as the servers do not know better, they will connect to each other via this path.
The local switch is not used.
To use it, you must add a static route to the setup.
E.g. phyA must know: "To connect to anything in the 2001:db8:b:b::/64 or in the 2001:db8:c:c::/64 network, route the packet via eth1."
With IPv6, you define such routings via link-local addresses and devices.
Let’s start with the address. "Link-local" addresses are an IPv6 concept which has no direct counterpart in the IPv4 world.
Actually, each IPv6-capable network link automatically assigns itself a world-wide unique "link local unicast" address.
It starts with fe8 to feb. In our example, the eth1 network card in phyB got the link-local address fe80::ff:fee1:b.
This address cannot be used to access the server from the outside as link-local addresses are never routed between networks.
However, it can be target of a local routing, e.g. on an additional local switch like in this example.
It is possible and sensible to say: "The routing target network 2001:db8:b:b::/64 can be reached via fe80::ff:fee1:b."
If you configure such a routing, the routing source must know how to reach that via address.
The network address does not help as all network cards in the routing source have an fe[8-b] network address.
The routing can only be used if it is additionally bound to a network card.
And this is precisely what we do: On phyA (and phyC) we configure: "The routing target network 2001:db8:b:b::/64 can be reached via fe80::ff:fee1:b on device eth1."
14.1. Manual configuration with Netplan
In Netplan, this configuration is very simple to archieve:
network:
  [...]
  ethernets:
    [...]
    eth1:
      dhcp6: no
      routes:
        - to: 2001:db8:b:b::/64
          via: fe80:ff:fee1:b
Note that eth1 must be mentioned somewhere in the configuration, otherwise it will not be brought up by the kernel.
Then, the route is simply added. netplan try or netplan apply activates it and of course it will be setup again after a reboot.
The same way, you configure phyB, but with the network and link-local via address of phyA:
network:
  [...]
  ethernets:
    [...]
    eth1:
      dhcp6: no
      routes:
        - to: 2001:db8:a:a::/64
          via: fe80:ff:fee1:a
14.2. Auto-configuration with radvd
|
This does not work with Ubuntu 20.04
The systemd-networkd included into Ubuntu 20.04, which is behind the Netplan-based network configuration, does not handle the advertisement messages correctly and drops the routes once their first advertisement expires or simply does not receive them in the first place. It’s a mess… I’ve not tested this yet with Ubuntu 22.04 but hopefully this bug is fixed. |
Configuring the additional static routes on all systems explicitly can become rather tedious.
Fortunately, if you have radvd running on the system - as we have on our physical hosts - it can also do this job.
The idea is that each system which is connected to the local switch just announces itself as gateway to its network.
On phyA, the according definition looks like this:
interface eth1 {
  AdvSendAdvert on;
  AdvDefaultLifetime 0;
  route 2001:db8:a:a::/64 {
    AdvRouteLifetime infinity;
  };
};
With AdvSendAdvert we enable information advertisment generally.
AdvDefaultLifetime 0 declares that this system is not a default router but handles only traffic for the targets explicitly mentioned in the routes.
Finally, route declares the route to the network of this system.
AdvRouteLifetime infinity declares this route to be valid forever.
Equipping all servers connected to the local switch will make all servers connected to all other servers through their respective eth1 links.
The routing table of phyA will look like this:
2001:db8:b:b::/64 via fe80::ff:fee1:b dev eth1 proto ra metric 1024 pref medium
2001:db8:c:c::/64 via fe80::ff:fee1:c dev eth1 proto ra metric 1024 pref medium
[...]
default via fe80::1 dev eth0 proto static metric 1024 pref medium
14.3. Considerations
IPv6 has some routing concepts which are rather different from how IPv4 works.
Using the link-local IPv6 addresses of the interfaces has significant advantages over the usual "private address" approach of IPv4 in such situations:
On IP level, it is totally transparent over which interface the packets are sent. phyB is always phyB, regardless whether it is connected from phyA or from anywhere else.
Only phyA, however, will use the local switch for connecting, while everyone else will go over the global infrastructure.
And on phyA, you do not have to think about routing issues. You just connect to phyB and in the background, routing is done through the appropriate interface.
15. Firewall configuration
Often, firewalls are used to - hopefully - increase the security level of hosts. A physical host serving potentially a number of virtual machines can be a valuable attack target and therefore it makes great sense to implement such an additional protection layer.
It is important to recap the overall layout: We use a bridged setup. I.e. from the network perspective, the physical host and all the virtual machines are independent. So, the physical host (and its firewall) do not even see all network traffic for the virtual machines.
So, generally, a firewall on the physical host does not need to take the traffic of the virtual machines into consideration - with two important exceptions:
-
The physical host serves the DNS server for all virtual machines.
-
The physical host also runs the NAT64 server for the virtual machines.
Both services must be accessible for the virtual machines. Apart from that they are as good or bad as any other server "on the internet" when it comes to connecting to services on the physical host.
We will now see how to enable the services mentioned above on the physical host in the firewall.
15.1. Shorewall on the physical host
Shorewall is a quite sophisticated system to manage the complete network routing rules on a host. It replaces all rules in the routing tables. This can render services unusable if you do not configure them in Shorewall’s own rules.
Shorewall separates IPv4 and IPv6 strictly from each other in all configuration steps. While this makes sense from the protocol point of view, you have to always keep both protocols in mind and might repeat some configuration steps for both protocols.
Following Shorewall’s structure, we look at IPv6 and IPv4 configuration separately.
15.1.1. IPv6 configuration
We start with configuring the IPv6 firewall.
All IPv6-related configuration files are located in /etc/shorewall6.
Shorewall has a hierarchically configuration concept for the system.
At the uppermost layer, you configure zones in the file /etc/firewall6/zones.
To the three standard zones of the usual two-interfaces-example, you add the nat64 zone for the Tayga NAT64 service:
# cat /etc/shorewall6/zones
#ZONE   TYPE    OPTIONS   IN  OUT
fw      firewall
net     ipv6
loc     ipv6
nat64   ipv6
Then, you assign the interfaces to these zones. The net zone representing the "outer world" contains the bridge:
# cat /etc/shorewall6/interfaces
?FORMAT 2
#ZONE   INTERFACE       OPTIONS
net     br0             tcpflags,nosmurfs,sourceroute=0
loc     v+              tcpflags,nosmurfs
nat64   nat64           tcpflags,forward=1
Note that the local zone “loc” has no real use in our setup.
It contains the "virtual bridge" devices virbrX which are created by KVM automatically.
We do not use them as they open a routed (and address-translated) IPv4 network for virtual machines with private IPv4 addresses.
You should leave the specification intact, however, as it might be handy for actual local networks.
On the IPv6 side, this is enough to assign the correct interfaces to the zones and to enable Tayga’s NAT64 mechanism.
You do not need to add any policy settings regarding the nat64 zone in the IPv6 protocol.
With this setup declared, outgoing connections are generally allowed while incoming connections are completely blocked. As the server is only remotely accessible, this is not really optimal. Therefore, you have to add some actual rules to drill all the needed holes into this firewall. At least four services should be accessible:
-
Basic IPv6 protocol stuff
-
ssh
-
DNS for the virtual machines
-
NAT64 for the virtual machines.
This can be archived with the following Shorewall IPv6 rules setup:
At least ssh connections must be possible. I suggest to also allow some IPv6 basic connection protocol packets:
# cat /etc/shorewall6/rules
#ACTION         SOURCE  DEST  PROTO      DEST           SOURCE  ORIGINAL  RATE

# Declare rules for new packets
?SECTION NEW

# Declare shortcut for server names
?SET VHOSTS "[2a01:4f8:1:3::]/64,[fe80::]/10"

# IPv6 services
ACCEPT          all     all   ipv6-icmp  time-exceeded
ACCEPT          all     all   ipv6-icmp  echo-request   -       -         3/sec:10
Trcrt(ACCEPT)   all     all

# ssh from everywhere
SSH(ACCEPT)     net     all

# DNS for virtual hosts
DNS(ACCEPT)     net:$VHOSTS  fw

# NAT64 for virtual hosts
ACCEPT          net:$VHOSTS  nat64
With this setup, the virtual hosts can access the DNS64-capable DNS server on the physical host and (the IPv6 part of) the NAT64 service.
Remember: Other connections to and from the virtual machines are not affected by these firewall settings! We are using a bridged setup, so logically, all packets between the virtual machines and "the internet" are just forwarded. If you want to filter the internet traffic on the virtual machines, you just install a firewall there.
15.1.2. IPv4 configuration
IPv4 in Shorewall’s configuration similar to the IPv6 part.
All configuration files for IPv4 filtering are kept in /etc/shorewall.
You need to add the nat64 zone to the zones here, too:
# cat /etc/shorewall/zones
#ZONE   TYPE
fw      firewall
net     ipv4
loc     ipv4
nat64   ipv4
You also have to assign the interfaces to the zones just as in the IPv6 configuration:
# cat /etc/shorewall/interfaces
?FORMAT 2
#ZONE   INTERFACE       OPTIONS
net     br0             tcpflags,nosmurfs,routefilter,logmartians,sourceroute=0
loc     v+              tcpflags,nosmurfs
nat64   nat64           tcpflags,nosmurfs,routefilter,logmartians,routeback
In the IPv4 protocol, the nat64 interface actually communicates with the outside.
This has to be allowed in the firewall.
A complete functional policy set looks like this:
# cat /etc/shorewall/policy
#SOURCE         DEST            POLICY          LOGLEVEL
net             fw              DROP            info

fw              net             ACCEPT
nat64           net             ACCEPT

fw              loc             ACCEPT
loc             all             ACCEPT

# THE FOLLOWING POLICY MUST BE LAST
all             all             REJECT          info
The IPv4 rules do not contain any configuration specific to our setup. They are totally generic and could be like this:
#ACTION         SOURCE          DEST            PROTO
?SECTION NEW

Rfc1918(DROP)   net             fw

ACCEPT          all             all     icmp    fragmentation-needed
ACCEPT          all             all     icmp    time-exceeded
ACCEPT          all             all     icmp    echo-request    -       -       3/sec:10
Trcrt(ACCEPT)   all             all

# ssh from everywhere
SSH(ACCEPT)     net     all
Once again: You do not need to enable any services or ports needed by the virtual machines. This traffic will not go through the firewall of the physical host.
There is one important final configuration detail: As described above, Tayga uses the default network address translation mechanisms of Linux for the NAT64 process. Therefore, it adds a network address translation rule into the firewall on startup. However, when Shorewall starts later, it empties the complete rule set which breaks Tayga.
To prevent this, Shorewall needs an additional snat (source network address translation) rule which brings the rule needed by Tayga into Shorewall’s own configuration:
# cat /etc/shorewall/snat
#ACTION    SOURCE               DEST
MASQUERADE 192.168.255.0/24     br0
With these rules applied to Shorewall, all network services of the IPv6 first setup run, the virtual machines can communicate through their DNS64/NAT64 translation layer and only those services are connectable from the outside which are enabled in the firewall.
15.2. Firewalls on virtual machines
Of course, you may install Shorewall (or any other firewall system) also on the virtual machines. You must even do so if you want to restrict access to services as these connections generally do not go through the physical machine’s network stack.
If your virtual machines are IPv6-only machines (as this guide recommends), you only have to care about IPv6 traffic. The machine will never see any IPv4 packets from the outside.
If your virtual machine has direct IPv4 connectivity with an official IP address, you have to take care for it in the firewall. For both protocols you configure the firewall just as if the machine was a stand-alone system. Direct incoming traffic is in both cases unaffected of the physical machine.
Note that even on virtual hosts with direct IPv4 connectivity, outgoing connections to IPv4 targets might still be passed through the DNS64/NAT64 layer so that the target machine will see the connection as opened from the physical host. The e-mail setup notes describe how to change that (just do not use the DNS server of the physical host).
15.3. ssh firewalling with sshguard
The Shorewall rules recommended above enable ssh unconditionally from everywhere. While this usually has no security implications, log files clobbered with warnings become quite annoying. A simple and quite effective solution is the small "sshguard" package available for many distributions.
sshguard scans the logs for failed ssh logins. If there were too many attempts from one source, it creates a temporary rule in the network stack dropping all network traffic from that source.
sshguard can be installed alongside Shorewall without problems. If you use it, install it on the physical host and each virtual machine as each installation only knows about its own system.
If you have trusted networks which connect to the machine regulary, consider adding these networks to sshguard’s whitelist in /etc/sshguard/whitelist.
Then, sshguard will not block these addresses even if some failed logins are logged.
You can whitelist IPv4 and IPv6 addresses and address ranges in any order and combination.
16. IPv6-only quirks of different programs or environments
As IPv6-only environments are still rather few and far between, there remain programs or environments which might have problems with this setup to this day. This section collects such minor quirks and how to cope with them
16.1. Java Runtime environment
The Java Runtime Environment supports IPv6 for a long time now.
Actually, they started supporting it in a time when IPv6 implementations were far from mature - being it in Java itself or in the operating system.
To be able to supercede the IPv6-preference, the JRE got a property java.net.preferIPv4Stack. If this is set to true, Java always prefers IPv4 over IPv6 if both protocols were available for a connection.
In a NAT64/DNS64 environment, this results in severe problems: For an IPv4-only host and even for hosts reachable via both IP stacks, the DNS64 server delivers both the IPv4 and the (potential NAT64-routing) IPv6 address. Preferring IPv4 over IPv6 in such a case means trying to connect over the (unreachable) IPv4 path even though a working IPv6 route would be available. Connection errors and timeouts are the result.
If your Java program has problems in the IPv6-only environment, check if this option is still set somewhere, e.g. as a -D option in the command line or in some options.
Hopefully it is not compiled in.
Remove it and connections should go through again, either via genuine IPv6 or via the NAT64 relay.
Epilogue
We have finally reached the end of this documentation. I have now described how I setup a physical host and KVM-based virtual machines which operate with IPv6 connectivity only. I have also described how to bridge this setup so that services are also accessible from the IPv4-based internet. I walked not only through the system configuration but also showed how to configure services in this environment.
It’s time for some final points.
17. Experiences and lessons learned
I use the setup described here since October 2018 for my own internet server which serves multiple web sites, my complete private e-mail and a number of other services. The system works very reliably, I only had severe problems once when Ubuntu published a broken kernel which crashed the system constantly. Apart from that, routing, networking in general and the whole virtualisation do not make any problems.
Very early in the process, I learned that even in 2018, you cannot survive in the internet without IPv4 connectivity. In the beginning, I even planned to go without the NAT64/DNS64, but there are too many services which are unreachable then as they are only accessible via IPv4.
I also had to relax my "No IPv4"-policy for the virtual machines. E.g. e-mail servers can simply not be made available without direct IPv4 connectivity - or no IPv4-only mail servers will deliver any e-mail to them. For all more sophisticated services like video conferencing servers this also holds true. Therefore, adding an IPv4 address to the virtual machines is far more often needed than I hoped. However, it is important that this is always only "on top". Everything continues to work if you remove the IPv4 infrastructure - it is only unreachable from the "IPv4 internet" then. Hopefully, in the not too distance future this becomes less and less of an issue so that a true IPv6-only setup can be used without any disadvantages.
18. Maturity of configurations
This guide describes several configurations with different level of maturity. This is how the maturity is as of December 2022:
-
Physical host
-
Hetzner Online: Almost all systems configured this way are located at Hetzner’s data center.
- Ubuntu 22.04
-
The latest and greatest. Not yet in production usage on my systems but soon will be. No problems occurred during the tests.
- Ubuntu 20.04
-
Guide has been in use for several high-volume installations and everything works fine. Keep the problem with the router advertisements for additional static routes in mind, however.
- Ubuntu 18.04
-
In usage for production systems since 2018. Flawless. However, you should not use this any more as support for this version will end in April 2023.
-
Local network: I have also installed one system using this setup in a local network.
- Ubuntu 18.04
-
Works. Also the only one I’ve tried.
-
-
Virtual machines
- Ubuntu 22.04
-
Works out of the box.
- Ubuntu 20.04
-
Works out of the box. Especially, here are no problems with IPv6 router advertisements. Strange world…
- Ubuntu 18.04
-
Works out of the box.
- Windows 10
-
Works out of the box.